![]()
Welcome to our blog.
Sorry, no results were found, search again?
![]()
Welcome to our blog.
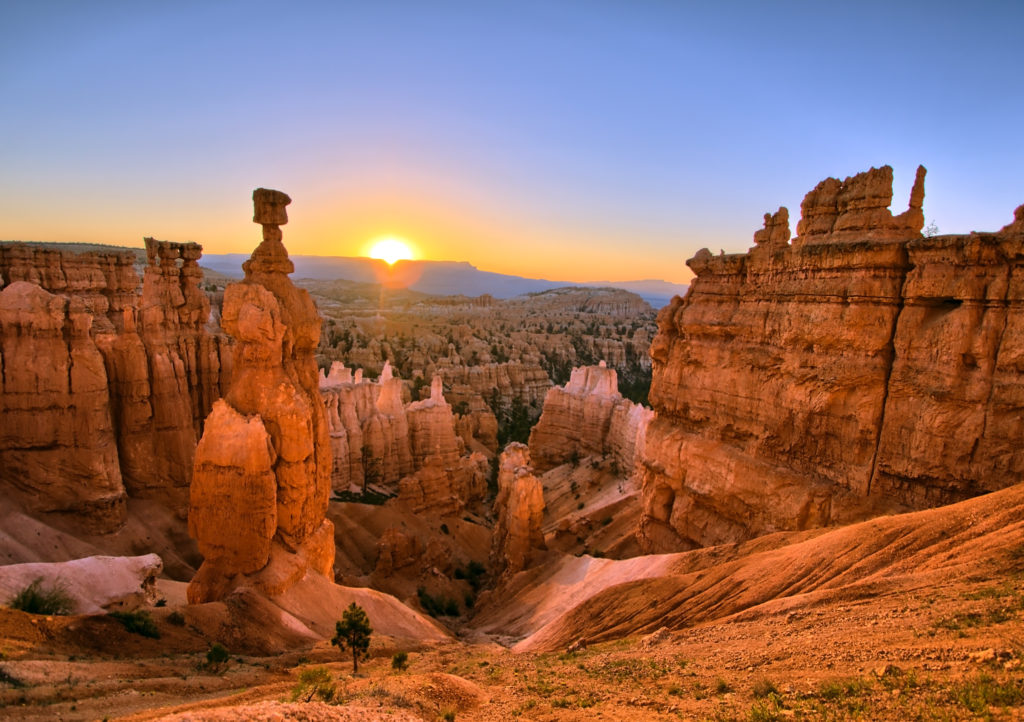
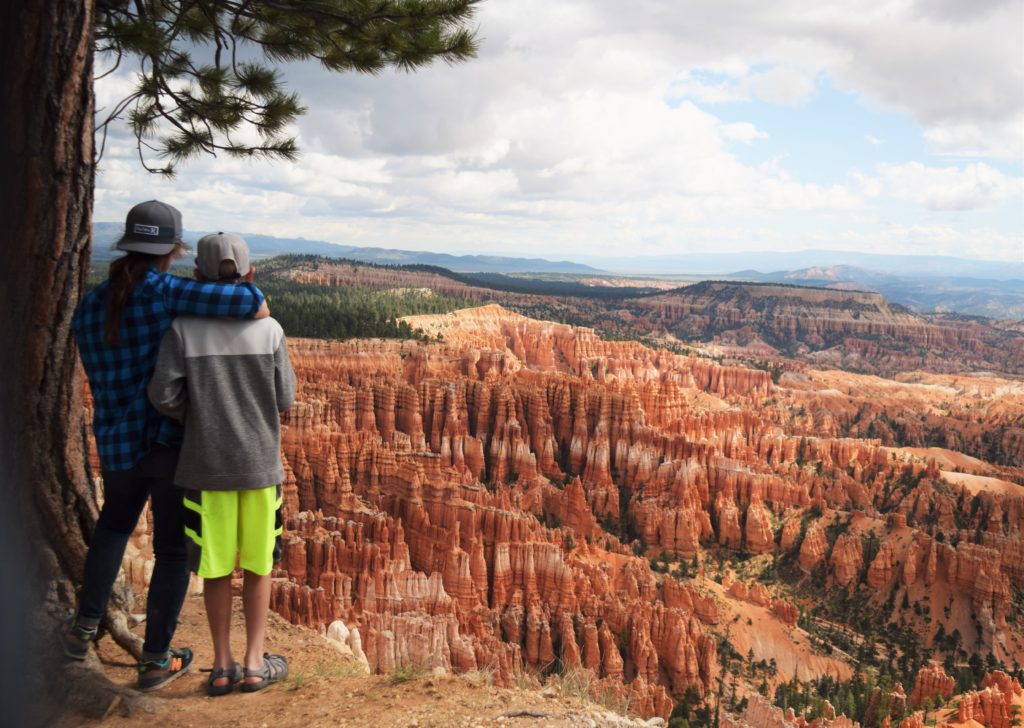
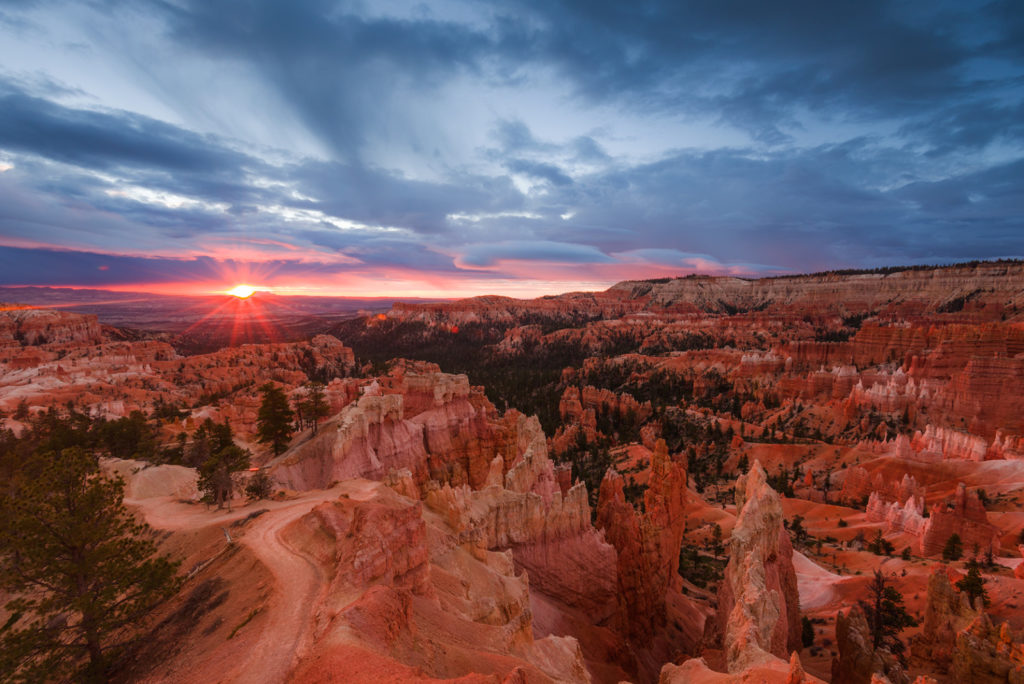
You’ve probably seen pictures of Bryce Canyon National Park. It’s one of the most unique and photographed landscapes in the world. And it’s also one of the best outdoor playgrounds with kids! From hiking and mountain biking its picturesque trails, to horseback riding, to watching the sunrise over the famous hoodoos, Bryce Canyon will leave you wanting more. There is so much to see and do in this beautiful National Park, it can feel overwhelming to try to fit it all in! Luckily, we’ve narrowed it down to the best places to explore in Bryce Canyon with kids in just a few days!
*This post contains affiliate links, which means we receive a small compensation if you make a purchase clicking the links.
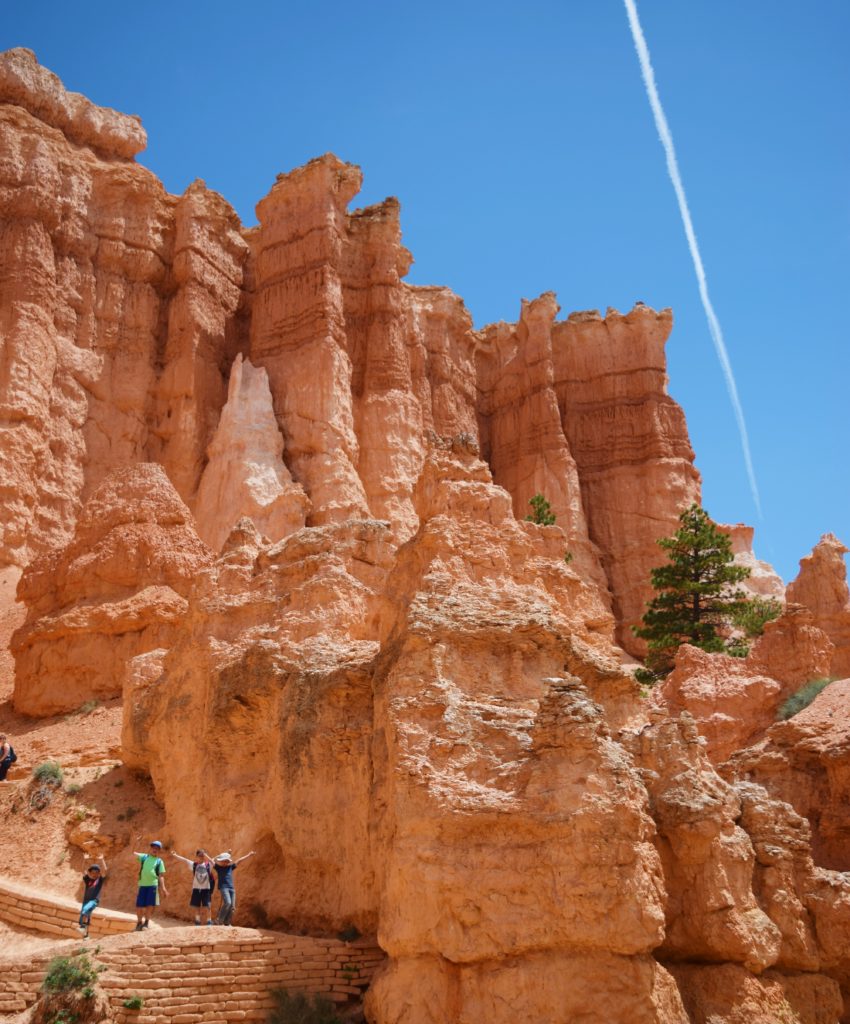
Bryce Canyon National Park is located in Southwestern Utah in the United States. The name Bryce Canyon can be confusing, because it’s not actually a canyon, but a collection of giant natural amphitheaters. It is comprised of many hoodoos, which are tall, thin spires of rock that protrude from the bottom of an arid drainage basin or badlands. There are hoodoos scattered throughout the world, but nowhere in the world are they more abundant than sections of Bryce Canyon.
Read our comprehensive guide below to help you plan your trip to Bryce Canyon with kids.
If you choose to camp in Bryce (which we recommend), there are several options and some require planning ahead, as campgrounds fill up fast in the summer months. Camping with kids is a lot of fun. One of the things we love most about camping with our kids is it is such a great way to unplug from the world and connect with nature and each other. It’s refreshing to see kids playing with the tools nature gave them—rocks, sticks, dirt, pine cones—all using their creative imaginations to make up games that involve the great outdoors.
Camping with kids is also a great way to get kids involved with planning, setting up camp and helping with meals. Read our post on other helpful tips for camping with kids and to get ideas on the best and most affordable camping gear, easy and fun meal planning, and games we like to play when we camp.
There are lots of great camping spots in and around Bryce Canyon. In the actual park, Bryce Canyon only has two campgrounds, Sunset and North Campgrounds. Sunset Campground is closer to all the best hiking trails (this was our choice), and North Campground is closer to the Visitors Center, the General Store (which is also next to the laundry and shower services). Both campgrounds are less than two miles away from each other.
As far as reservations go, both campgrounds offer mostly first-come, first serve campsites, with only a few tent sites and one group site available that you can go online and reserve up to 6 months ahead.
If you are unable to get a campsite inside Bryce Canyon, there are other great options outside the park that aren’t too far. We suggest Red Canyon, which is located just off scenic Highway 12 about 13 miles from Bryce Canyon and looks a lot like Bryce Canyon actually! There are some great hikes around there too. King Creek is another good option just outside Bryce Canyon.
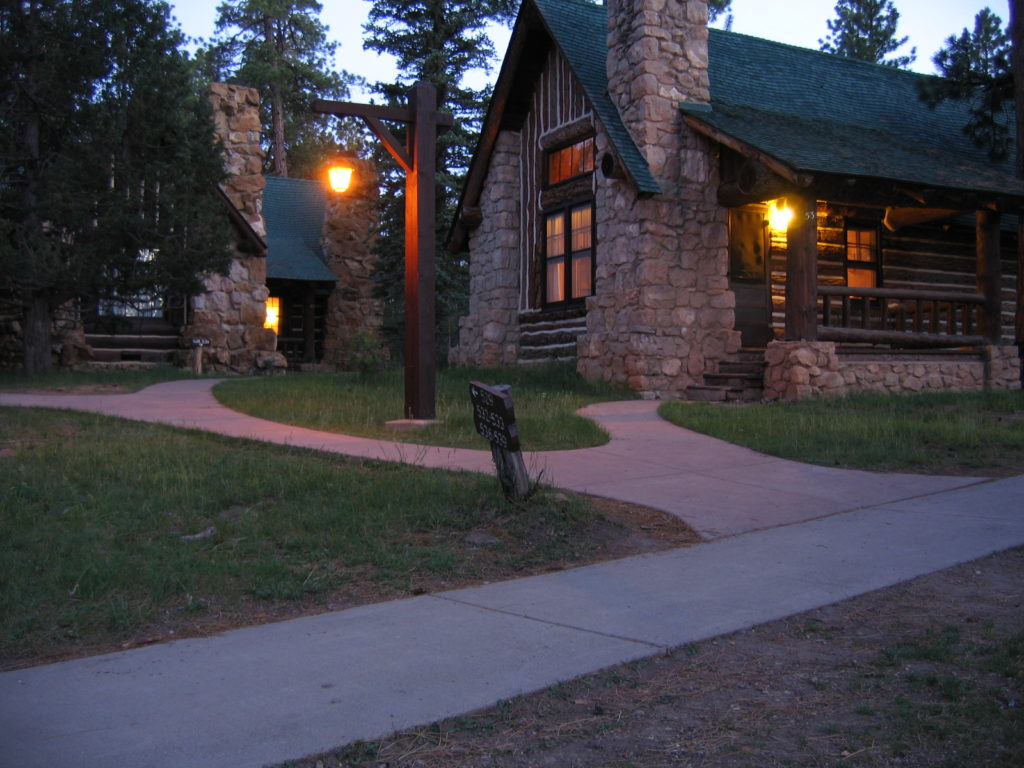
Bryce Canyon Lodge. Photo courtesy of Joshua Eckert via Creative Commons.
If camping isn’t your thing, there are plenty of lodging options in and around Bryce Canyon. The only lodging option inside the park is Bryce Canyon Lodge which is a beautiful, rustic lodge that sits near the Rim Trail and overlooks the whole canyon. The Bryce Canyon Grand Hotel is the most popular in the area. There is also Ruby’s Inn, which has traditional-style lodging, but also has cabins and tipis available to rent (with the amenities such as the pool and showers included)!
For a complete list of your lodging options in Bryce, as well as the best rates on any of the hotels listed above, make sure to use our favorite resource for booking the cheapest accommodations.

Interior of Bryce Canyon Lodge. Photo courtesy of Brandon N. via Creative Commons.
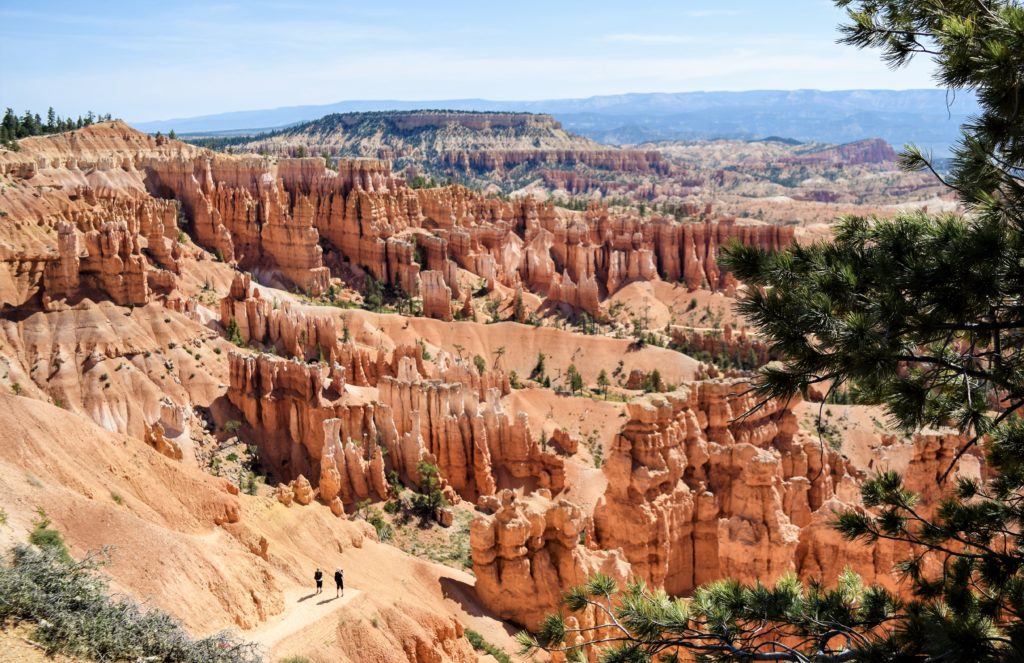
Bryce Canyon is the perfect “eye candy” with epic views of the whole canyon from above the canyon and below (accessed from various trails, see Hikes in Bryce). We suggest seeing Bryce from both perspectives because they offer stunning and unique viewpoints! Bryce Canyon is truly a photographer’s dream. If you need ideas on camera gear, we’ve made it simple with our go-to favorites for traveling and capturing amazing outdoor photos. There are plenty of photo ops along the Bryce Amphitheater such as:
Sunset Point and Sunrise Point both offer amazing views of the canyon from different angles.The Rim Trail between these two points is an easy, flat 0.5 mile trail connecting the two points. The Rim Trail is easily accessed (and wheel chair or stroller accessible along most of this trail) from the campgrounds and parking lots inside the park. You can go on a guided Ranger-led hike and learn more about the history and geology of this National Park or you can go on your own (both recommended!).
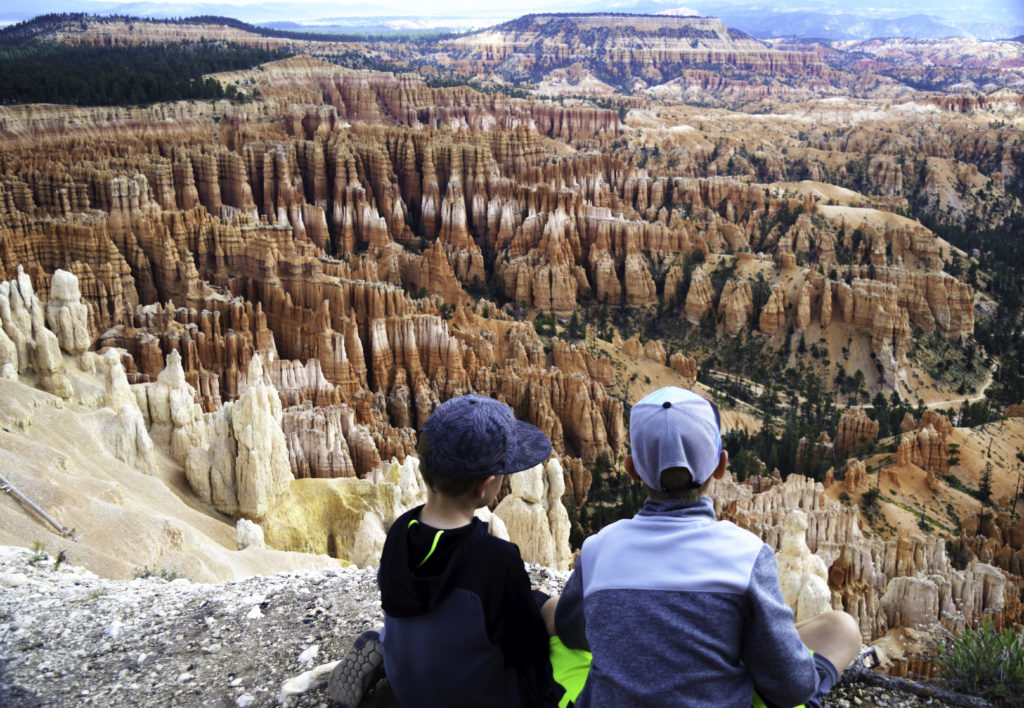
Inspiration Point is the best spot to watch an amazing sunrise at Bryce Canyon (worth getting up early for!), where the hoodoos are positioned to catch the morning light. Inspiration Point is also accessed from the Rim Trail as well and consists of three levels that offer varied incredible perspectives of the main amphitheater. You can see both Sunrise and Sunset Points from here.
Bryce Point is at the lower end of the Rim Trail and serves as the trail head to Peekaboo Loop Trail, which meanders down the side of the amphitheater, among the Cathedral, and below the Wall of Windows. This is another great spot to savor the views over the park’s amphitheater at sunrise.
You could spend a whole week in Bryce Canyon National Park and not cover all of its extraordinary landscape. Fortunately, we have narrowed down the best day hikes to get stunning views in a variety of perspectives that will leave you speechless and wanting more. *Note: Most of these hikes are perfect with kids, but we have narrowed down the easiest to hardest in this list. Read our post on helpful tips on hiking with kids (and making it fun!).
Mossy Cave is probably the easiest hike other than the Rim Trail between Sunset and Sunrise Points and found on Highway 12 going toward Tropic just outside the amphitheater. You walk alongside a stream up to mossy overhang and a small waterfall. Keep in mind waterfalls only flow from May to October. (0.8 mile RT, easy)

Mossy Cave is a great trail to do in the hotter months. Photo courtesy of Sharing Horizons.
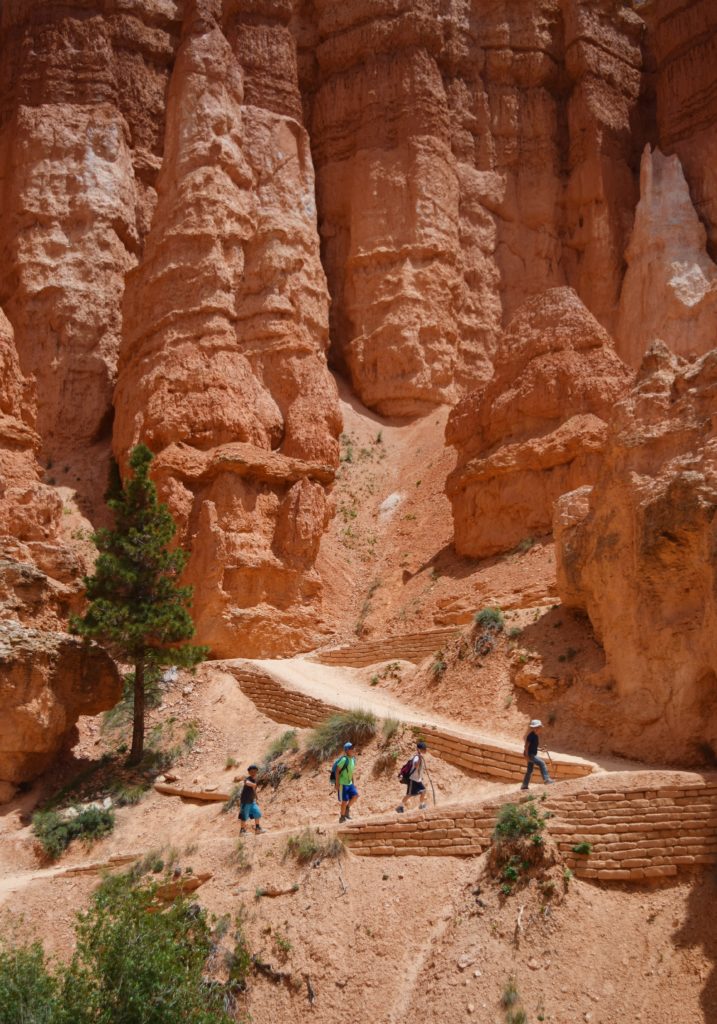
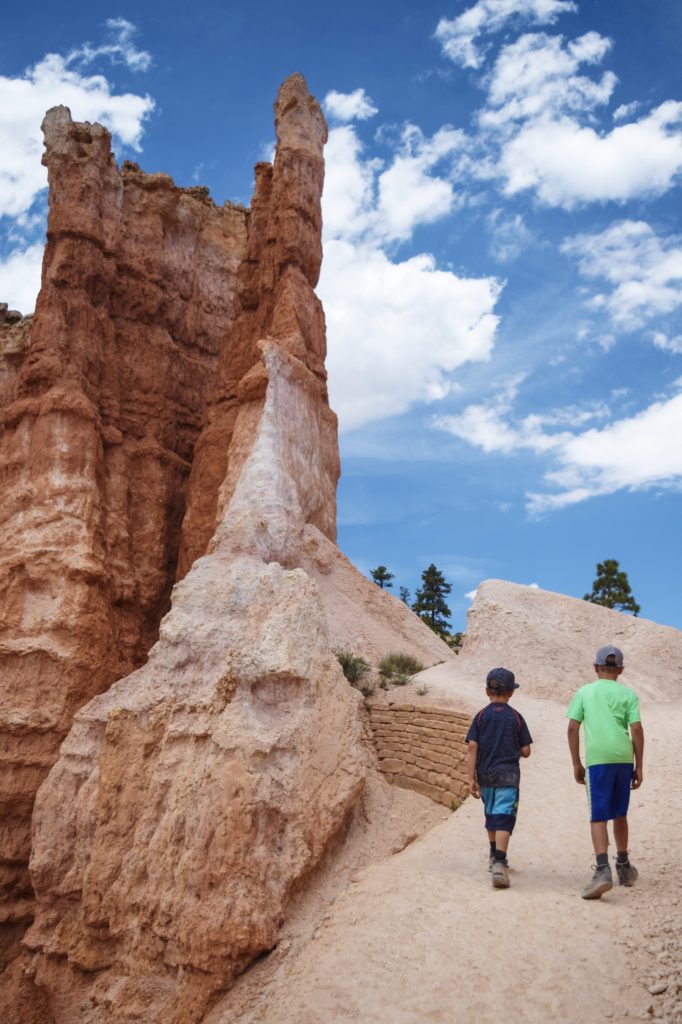
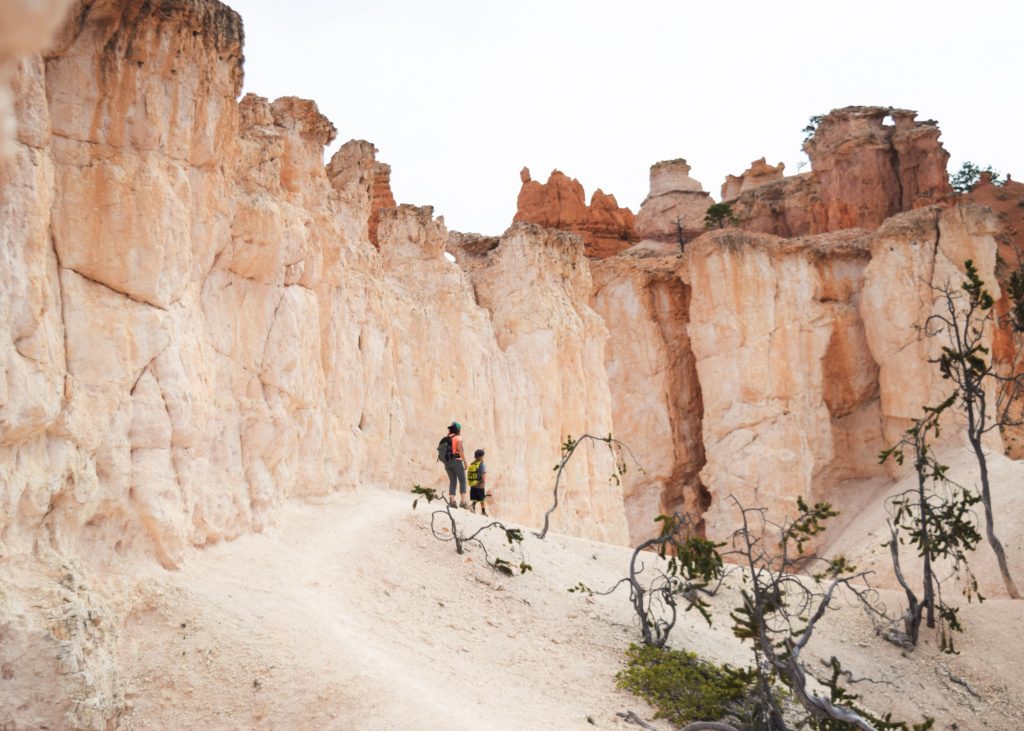
The Navajo trail is definitely a hike not to be missed! Probably one of the more popular hikes in Bryce, make sure to do this one in the morning during peak season (summer) before it gets too crowded and hot. This trail starts at Sunset Point and descends from the canyon rim to the floor and then up again (tip: hiking the trail clockwise is easiest!). One of the most stunning views is Wall Street, which is found after traversing some switchbacks along the trail.
Make sure to look up to get some spectacular views of the hoodoos and the trees sticking out through the red rock formations! Other points of interest include Two Bridges and Thor’s Hammer. Our kids all loved this hike because there were lots of rocks to climb and hide behind, as well as plenty of rest stops for snack and water breaks. (1.4 miles RT, easy to moderate)
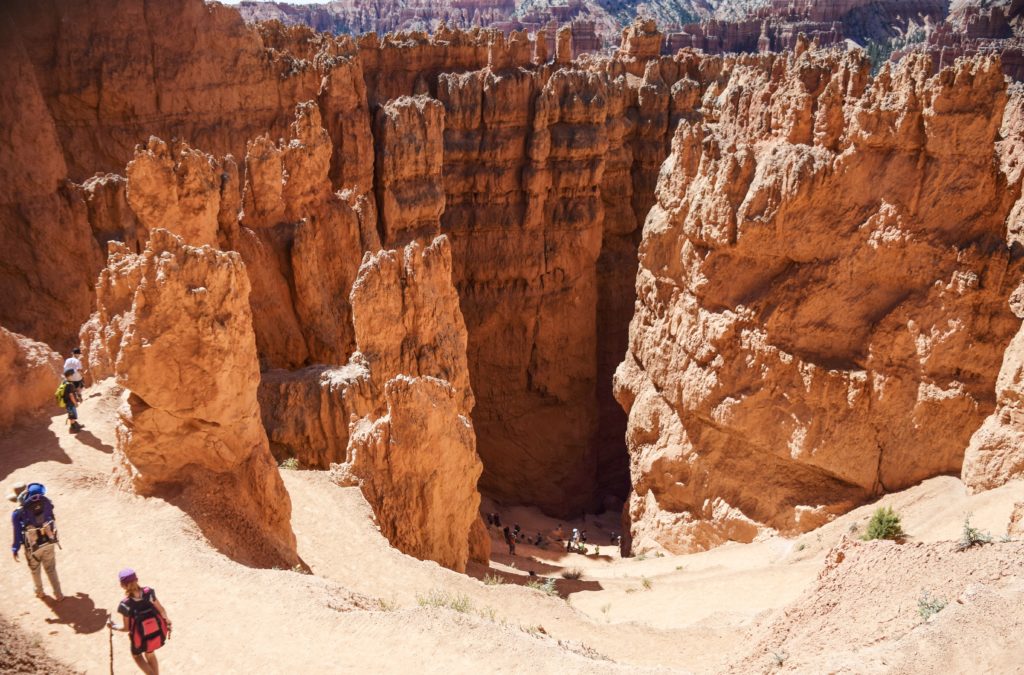
Descending on the switchbacks of the Navajo Trail
This short trail is probably the easiest trail down into the Bryce amphitheater. The trail head is located on the south side of Sunrise Point and offers awesome views of Queen Victoria (a formation that looks like the profile of the British monarch), Boat Mesa, the Sinking Ship, and the Aquarius Plateau. This hike has some tunnels and caves for kids to climb in too, and plenty of shady spots to stop and rest.
We recommend the popular option of combining the Navajo-Queen’s Garden loops together, (which is just a little over 3 miles RT) and if combined, the best and easiest option is to start at the Navajo Loop Trail Head at Sunset Point, leaving the canyon on the less steep Queen’s Garden Trail and returning at Sunset Point. This is such a great hike for kids and adults alike and the views won’t disappoint! (1.8 miles RT, easy to moderate)
To start the Peekaboo Loop trail, you will access it from the Bryce Point overlook parking area. This trail is open to those on foot and on horseback, so be mindful of horse droppings on the trail (you’ve been warned!). This scenic, yet strenuous hike winds among the hoodoos below Bryce and Inspiration points. This trail can have some loose rock, so place your feet carefully. From this trail, you will see the Canaan Mountains and the Kaiparowits Plateau in the distance, but close up, you will get good views of the Cathedral, the Wall of Windows, and the Three Wise Men. (5.5 miles RT, moderate to difficult)
The Fairyland Loop is longer and a bit more challenging, so best for older kids and adults with good stamina. We loved this hike because it offered some amazing panoramic views without all the crowds, but plan on it taking most of the day! This hike begins at Fairyland Point and descends into Fairyland Canyon (but also accessible from Sunrise Point which is where we started) and meanders up, down, and around Boat Mesa.
It also takes you to the base of Tower Bridge and then climbs to the China Wall. Halfway along the wall, the trail starts climbing back up the canyon, before reaching Sunrise Point and then completing the loop along the Rim Trail back to Fairyland Point. See our list of must-have gear for hiking with kids. (8 miles RT, difficult)
Fairyland Loop
If you’re not a hiker, there are plenty of other activities for kids and adults in Bryce Canyon. Below are some great ideas for activities around Bryce.
The National Park Service has a great program called Junior Rangers. We absolutely love this program! The idea behind it is to familiarize kids with the duties and responsibilities of being a park ranger, as well as learn about a the National Park they are visiting. In order to become a Junior Ranger, kids have to complete three tasks: attend a presentation or hike led by a Park Ranger, complete an activity booklet (age appropriate) that has a number of activities, and lastly, pick up litter in the parking areas or trails of the park (such a great idea!).
Once all of these activities have been completed, kids must return to the Visitor Center where they will be inducted as Junior Rangers and receive a free badge. These badges issued cannot be purchased or obtained except through the dedication of the child and the support of his/her parents. Read more about the Junior Ranger program at Bryce.
![]()
Horseback riding through Bryce is the one activity we wish we would have done with our kids and a very popular tour. It looks so fun and a great way to enjoy the dramatic views of Bryce (without the work of hiking!). Most tours are 2-3 hours long and led by a guide. Take a look at this horseback riding tour.
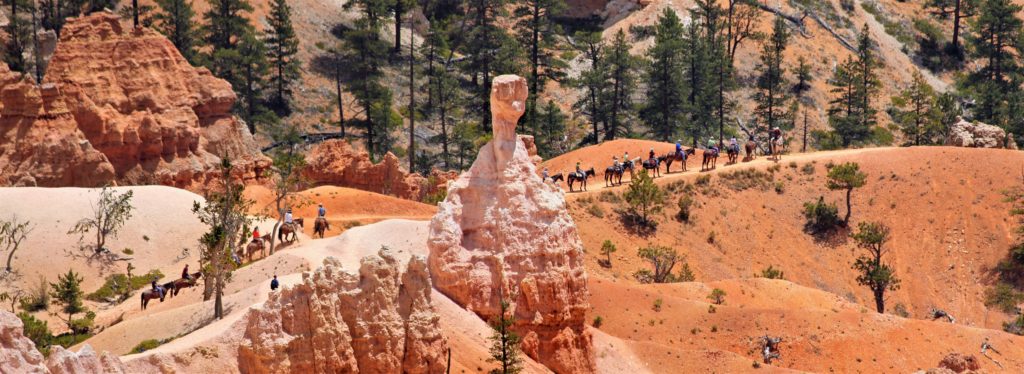
Horseback riding with Canyon Rides
Bryce Canyon and the surrounding area is a great place to ride bikes, both on paved roads and on and off trails! Within the park, bicycling is only allowed on paved roads. However, there are many opportunities to ride on single and double track trails, forest trails and on pioneer trails. This a good list of mountain bike trails around Bryce.
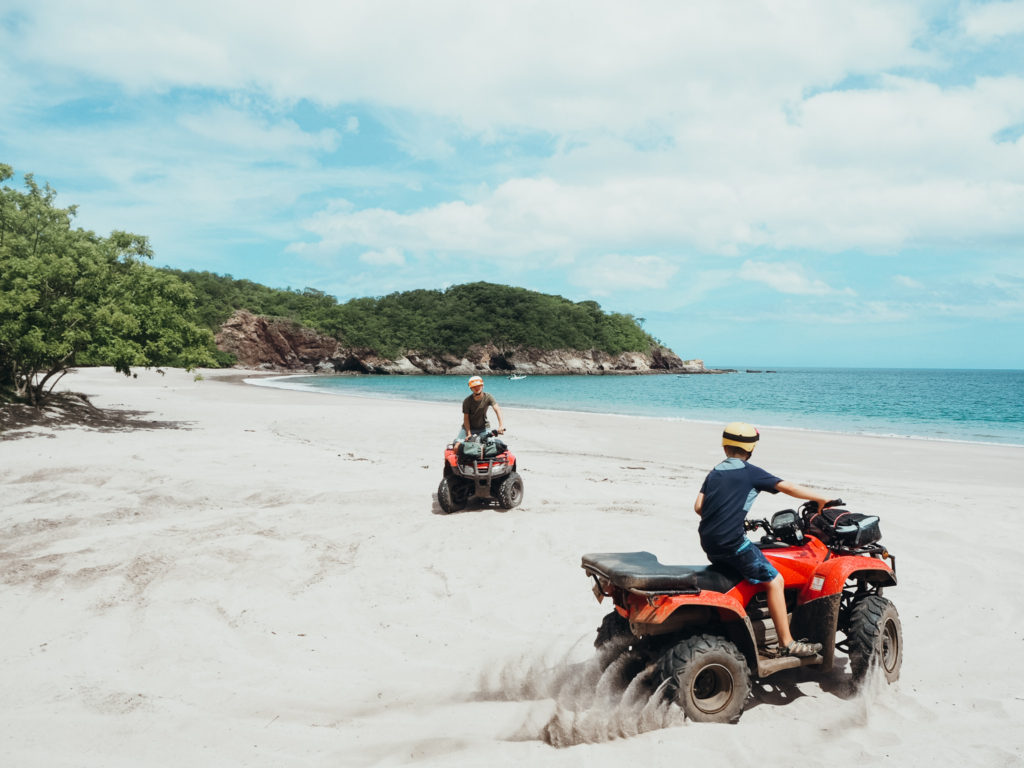
Want a bit of a thrill, but still enjoy the magnificent scenery of Bryce? ATV tours are a great way to experience all that Bryce has to offer. (*Note: ATV’s are not allowed in the National Park, only outside the park on designated trails.) This looks like an awesome ATV tour!
Starry Nights Telescope Viewing is a great ranger-led program that is family-friendly. Starting at the visitor center with a video presentation about astronomy and nocturnal animals, the tour then moves into the parking lot where telescopes are set up to get an up close view of the constellations. You can also join full-moon hikes led by the rangers as well.
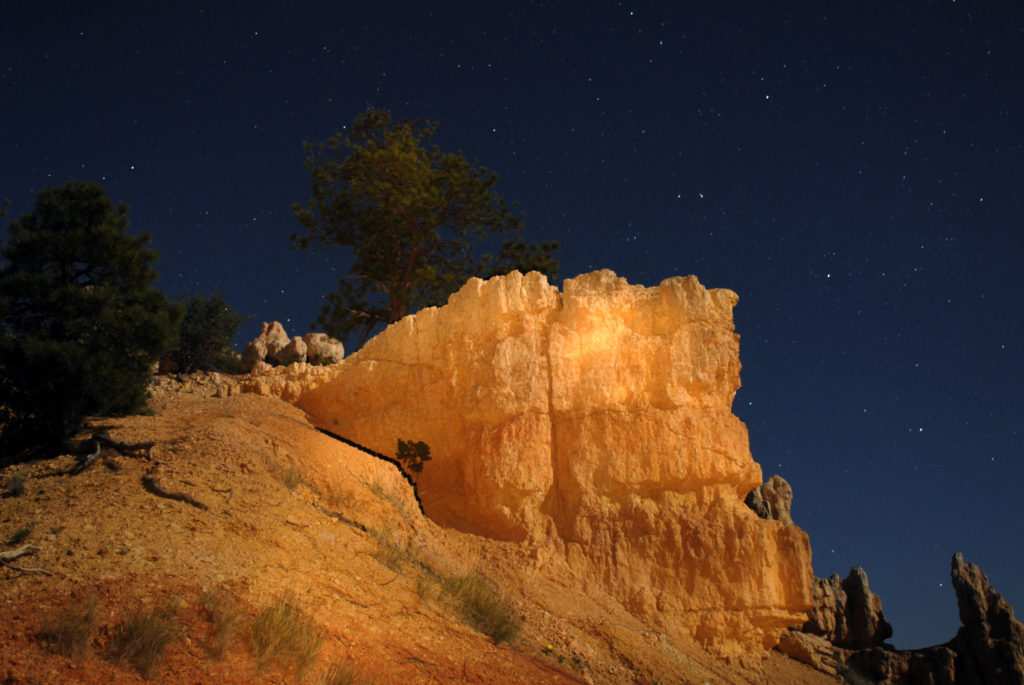
Bryce Canyon is spectacular to witness at night.
While we were at Bryce, we also explored two areas outside of Bryce in Grand Staircase-Escalante Monument that we think are worth mentioning and visiting if you have the time while in Bryce Canyon. One area required a little bit of driving for a day trip, but was totally worth the adventure! Both of these hikes are awesome with kids, and guaranteed fun for the whole family.
Willis Creek Slot Canyon is located off Skutumpah Road in Grand Staircase-Escalante National Monument (about a 40 min drive from Bryce Canyon). This is such a fun, easy hike that the whole family will enjoy. The mellow trail follows a flat, stream-bed path through some amazing slot canyon with narrow smooth, curvaceous cliff walls. If you love slot canyons, but don’t want to climb or shimmy your way through one (or have claustrophobia in tight spaces), this a great slot canyon that will satisfy your sense of adventure but not leave you feeling anxious!
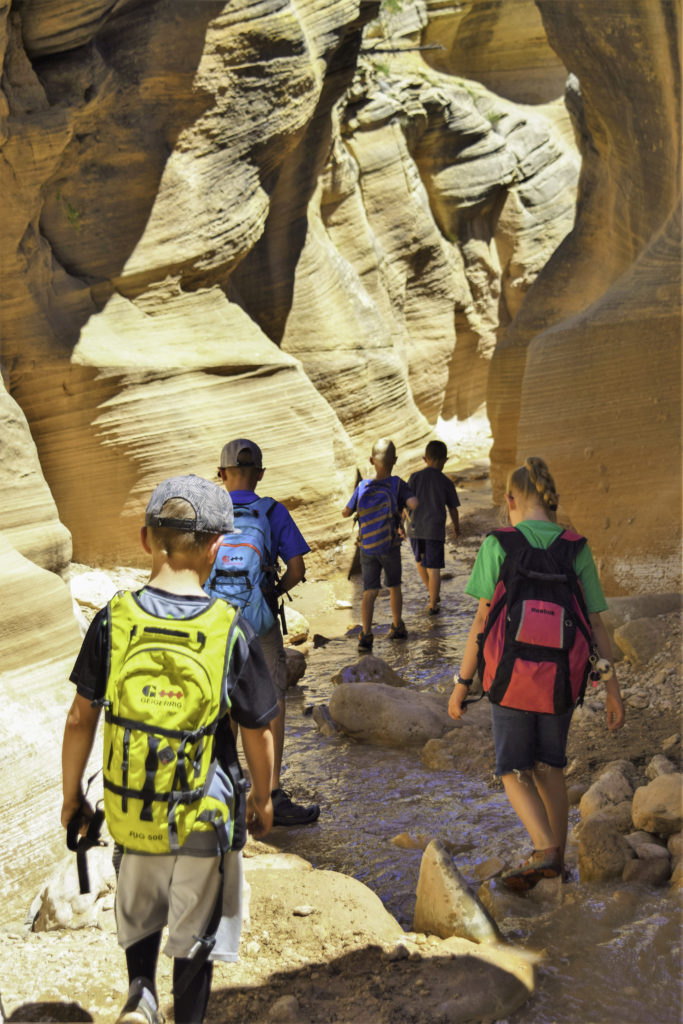
It’s a great hike in the heat of summer too because you are mostly shaded by the tall cliff walls surrounding you, plus you are walking in shallow water the entire time (kids love this especially)! It is beautiful and not often crowded, so all in all, a great day hike if you want to escape the crowds in Bryce. (4 miles RT, easy)
If you’re up for a SERIOUS adventure, these slot canyons are for you. Located in Grand Staircase-Escalante National Monument, in the Dry Fork area, these slot canyons are found 26 miles down the famous Hole-in-the-Rock Road off Highway 12. The entire route on Hole-on-the-Rock Road is an extremely rugged washboard road with sand traps and the occasional rut.
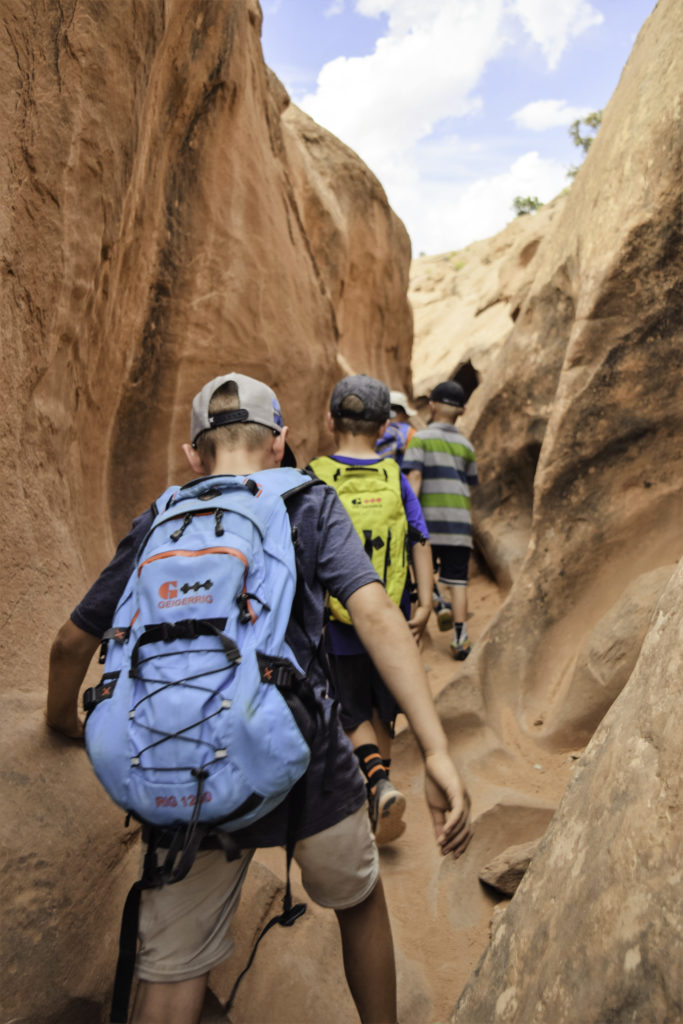
Though vans and cars can tackle the route (although we recommend driving fairly slowly), a four-wheel drive vehicle with good suspension is recommended. (*Note: There is limited to no cellular service down this road, so if you get stranded with car problems, it might take awhile to get help.) Once at the parking area of the trail head, you will find the start of the trail.
This trail is not super well marked, so we recommend going with someone that knows the area well or hike with others who you find along the trail (it’s always smart not to go alone). It’s also a good idea to stop at the Ranger Station in the town of Escalante and get a detailed map of the area along with an explanation of landmarks along the trail. Peek-a-boo Gulch is not a long or difficult hike, but it does require some rock scrambling skills in order to get through some of the narrow twists and chutes along the trail (that’s the whole fun of it!). Peek-a-boo can be combined with Spooky Gulch to make it a loop hike.
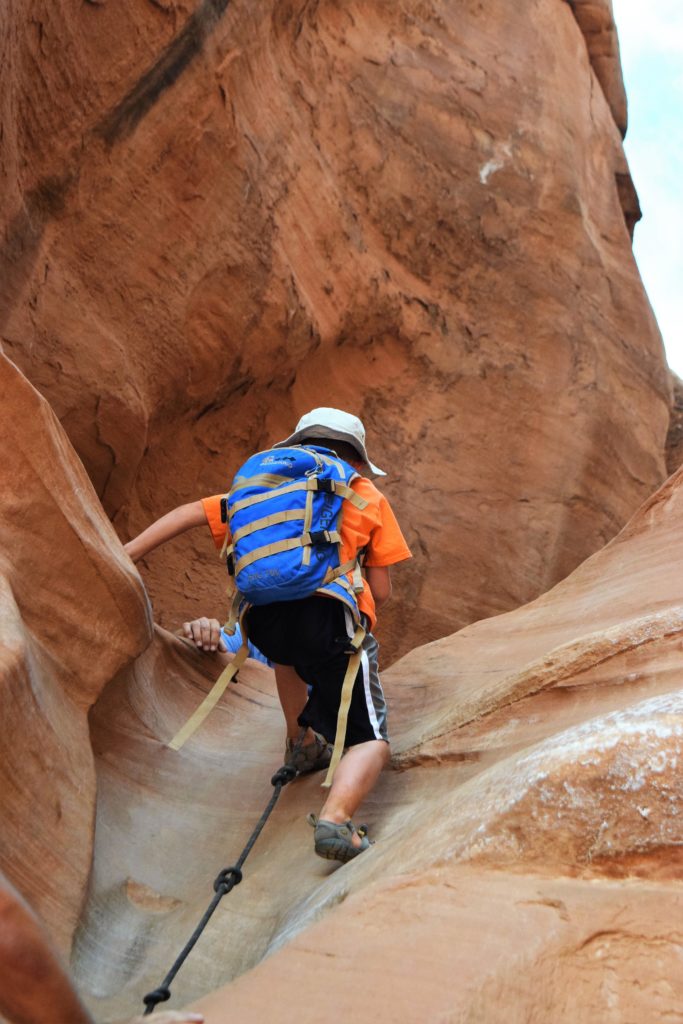
Spooky is well-named and infamous for how dark it gets when deep in this slot canyon, and for the adrenaline-pumping quality of its extremely narrow walls. Parts of the canyon are so narrow, it will require you to turn sideways and shimmy your way through (even taking off a backpack if you are wearing one). Kids love this part! It is generally recommended to do Peek-a-boo first, and upon exiting, hike up overland to the east for half a mile until the wide stream bed above Spooky Gulch is reached.
From there, you would follow Spooky back down to Dry Fork, and then hike back to the overlook where you parked. Plan on the whole hike taking 3-4 hours, plus the drive to and from the trail head. We can’t recommend this hike enough for adults and older kids (ages 6 and up) who want to do something truly adventurous. This hike will give you a good taste of what slot canyon hikes can be like! (4 miles RT if combined, moderate)
Bryce Canyon is one of our favorite national parks in any season (Winter just might be more beautiful with the snow!). It’s also located only a few hours from Zion National Park, where you can find plenty of outdoor activities in St. George and other family-friendly hikes in Southern Utah to keep you entertained for days on end.
For more gear options, visit our Recommended Gear page.
We all know that traveling can throw your healthy eating and exercising game off. It’s a delicate balance between wanting to indulge a little bit (after all, you’re on vacation!) and wanting to maintain a routine and good habits. Even when traveling with kids, the last thing you want to do is let them eat garbage all day long only to fight them when you come home and want to re-establish good eating habits again. Also, staying healthy while traveling isn’t just about eating nutritious food. It’s doing your best to avoid illness as well. Particularly when traveling to foreign countries, it’s especially important to take precaution and be armed with some tools to help you combat any illness or diseases you come across.
So, we’ve put together a list of 11 tips for staying healthy while traveling. These tips have made a big difference and know will they will help you too. (*Note: There is no 100% guarantee you won’t get sick following these tips, but they will certainly help minimize your risk.)
*This post contains affiliate links, which means we receive a small compensation if you make a purchase clicking the links.
Make it a priority to exercise when you’re traveling, even if that means a quick 15 min workout in your hotel room, a brisk walk in a park, a bike ride, an online yoga routine, etc. Sounds like common sense, right? But in actuality, most people take a break from exercising when on vacation. Keeping active is important not only for your body, but for your immune system too. Our favorite exercises combine multiple muscles together to get a total body workout in a short amount of time. You can find great (short) total body workouts on many kinds of apps.
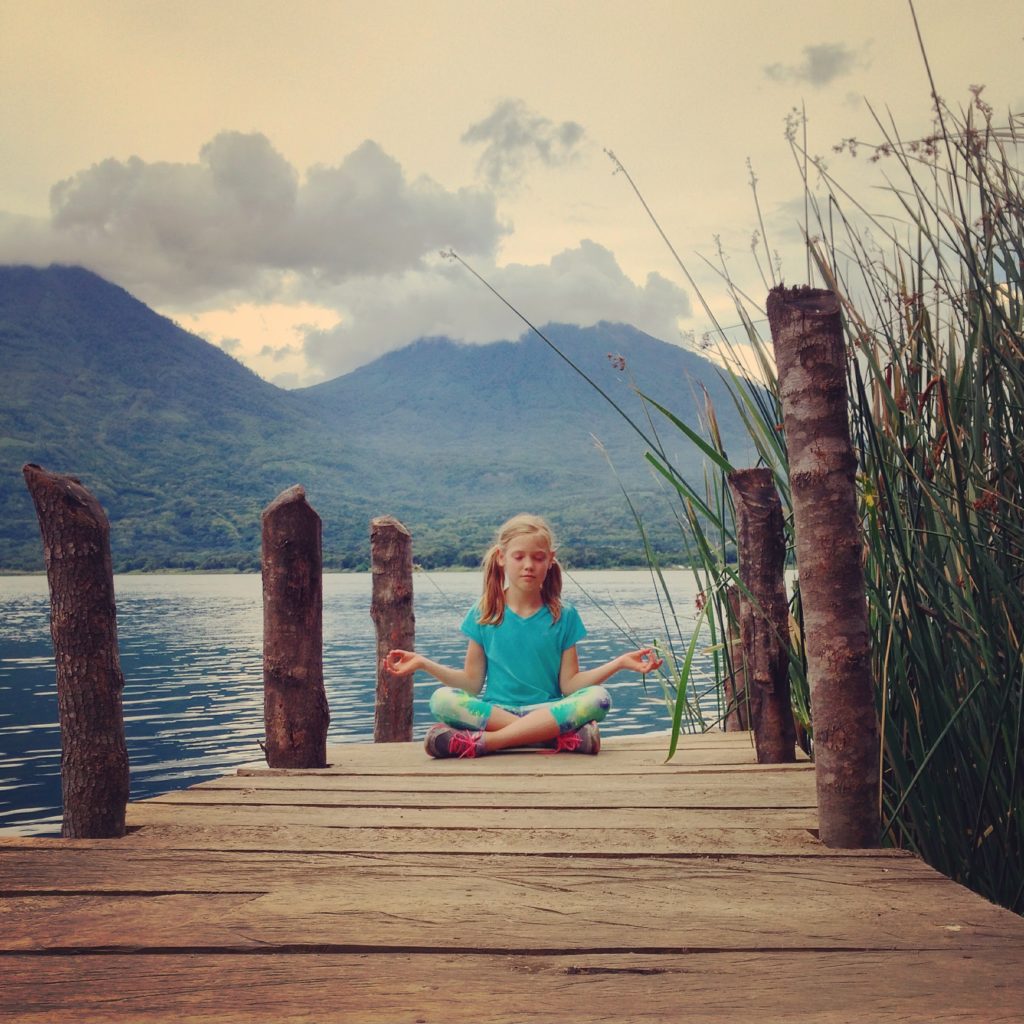
Namaste in Guatemala
One of our favorite workout apps is 12 Minute HIIT because for most of the exercises, no equipment is necessary making this a great alternative to the gym when traveling. Great total body workouts designed in 12 min! I also love Jefit and MyFitnessPal (which is our favorite for tracking food too). There are many great instructional yoga apps too which makes yoga easy to do on the road. We personally love Pocket Yoga and Daily Yoga.
One of our favorite exercise items to bring with us traveling are TRX straps because there are endless exercises you can do with them (talk about a total body workout!), they pack light, and all you need is a door frame to anchor them. We can’t travel without these! We also love a GoYoga mat, which is also essential on the road.
This might seem simple, but it’s a biggie. Not only will this save you money in the long run, but packing your own snacks can save you from eating too many treats on the go and on the road. Head to the grocery store and market when you first arrive in town and stock up on your favorite healthy snacks (or bring them with you on your carry-on). We love fresh fruit (such as apples), whole food and protein bars, trail mix, nuts, dried fruit, jerky, etc. We love this healthy snack pack because you get such a good variety and can even sign up for the monthly subscription to get the best deal!

We love making our own trail mix
For us, breakfast or lunch is the best meal to try to eat fresh while traveling. Of course, when you’re traveling, you want to be able to indulge a little and try the local food fare, but you also don’t want to eat too many heavy foods. Also, if stay in an Airbnb, usually you will have a kitchen you can purchase food at a market and cook for yourself. This is probably one of our #1 tips as far as eating and traveling goes.
It’s expensive to eat out as a family for every meal, so we try to stay in a place with a kitchen of some sort so that we can save on money and eat fresher and healthier. If that it’s an option, try to choose healthier restaurants and opt for vegetarian meals, grilled options over fried and of course, choose a salad (my favorite option for eating out) Don’t skip breakfast too!

Photo courtesy of Saaleha Bamjee via Creative Commons.
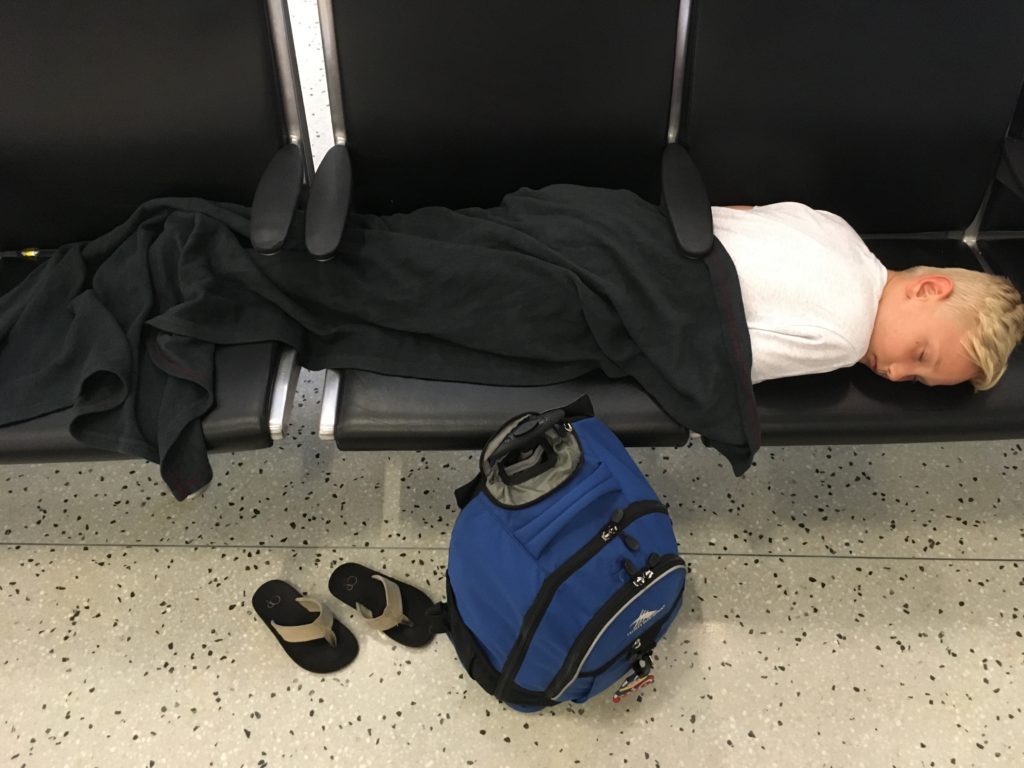
This might seem obvious but most people don’t sleep enough (or sleep smart) when they’re traveling, especially overseas. The most important thing you can do while traveling is sleep. Your body needs adequate rest when you’re traveling, crossing time zones, carrying luggage to and from destinations, walking all day, etc. As far as jet lag goes, one of the best ways to reduce its effects is to get on the local time schedule before you leave. A few days before you fly to your destination, start to go to bed closer to your destination’s time zone.
If it’s five hours later where you’re headed, go to bed an hour or two later and wake up the next day an hour or two earlier. Doing this for just two or three days prior to your departure can really make a difference and give your body a boost upon arrival. If it helps, even set your clocks ahead at home a few hours to help your body pre-adjust. Adjusting to a new time zone with kids can be even harder, and you have to be more flexible but these tips below can help with kids too.
Here are some other helpful tips:
Planning ahead before traveling will save you big time on keeping healthy habits while traveling. Before you go, research healthy restaurants in your destination and/or know what supermarkets you can shop at if you will be cooking at all.
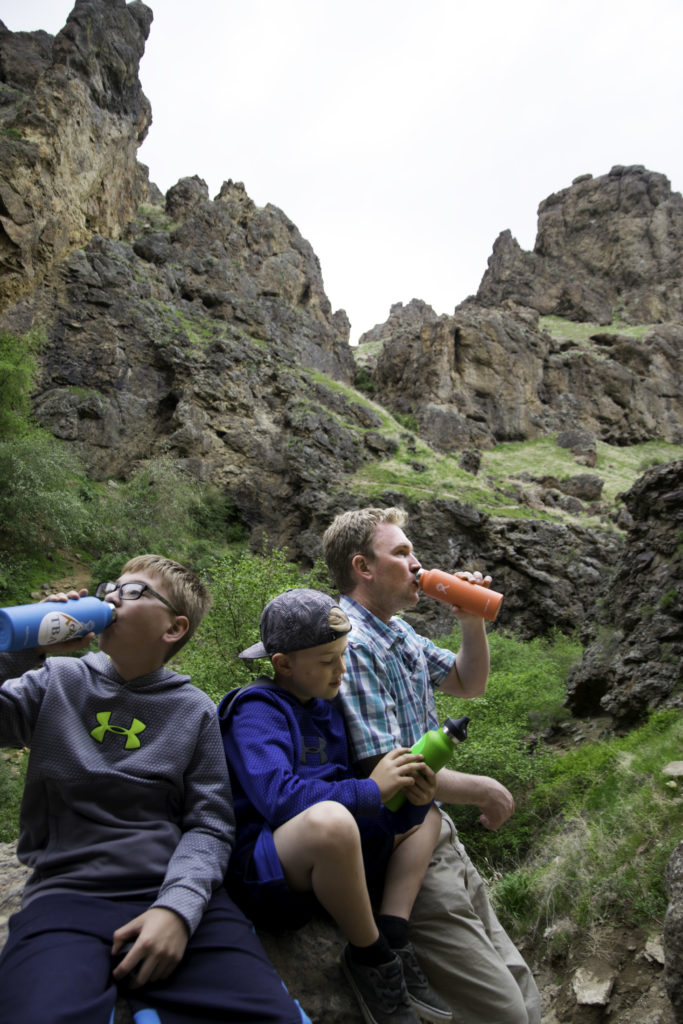
If you get in the habit of carrying a reusable water bottle around, you are more likely to drink more water and stay hydrated. If you are in a foreign country where the water isn’t safe to drink, there are some great options for water bottles that have a built-in filter in them (or this Sawyer portable water filtration system), to make your water safe to drink. We are also obsessed with Hydroflasks because not only are they re-usable and made with stainless steel, but they keep your water cold for 24 hours (or hot!).
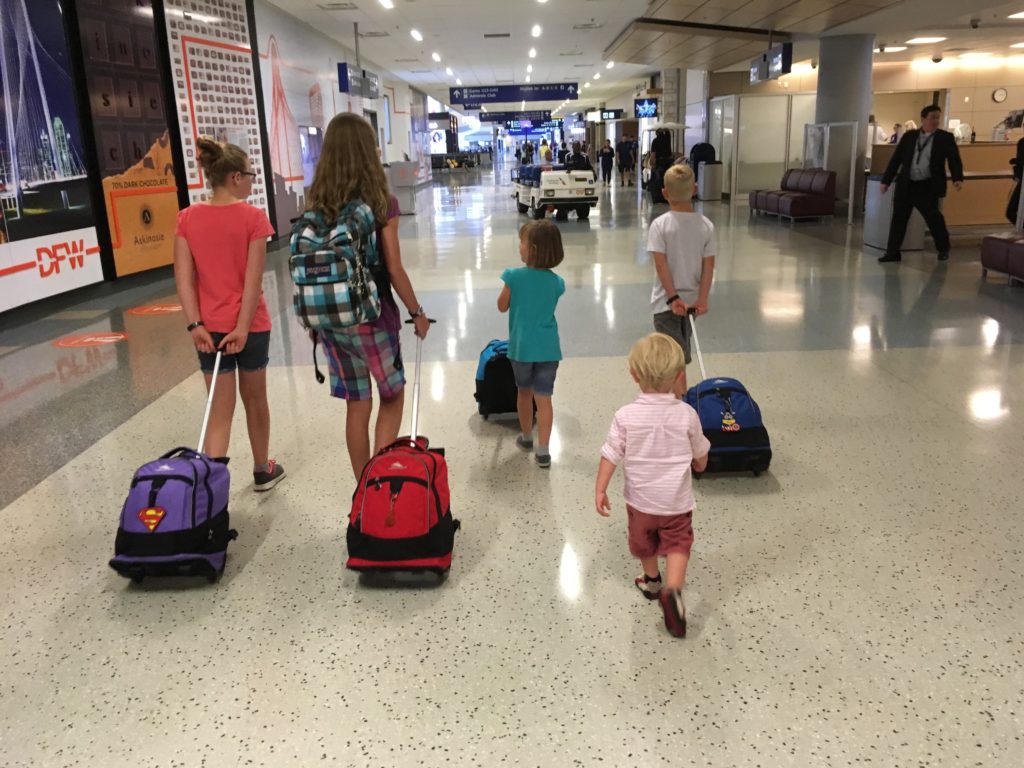
This can be tough sometimes, but can save you muscle and back aches in the long run having to lug around heavy luggage. Try to pair down what you need to bring on your trip by just bringing the essentials (don’t forget good walking shoes most importantly!) and if you know you can get to a laundromat during your travels, utilize it so you don’t have to bring so much clothing. We also love packing cubes to help you organize your luggage as well as store more.
There are so many great remedies out there to combat illness, stomach issues, sleep, and more. If you take vitamins and supplements on a regular basis, there’s no reason to stop when you travel. Continue to take them as to help boost your immune system (along with the other tips mentioned) to hopefully help prevent any sickness. Probiotics are especially important as they boost gut health, which is essential when you’re traveling somewhere new and eating foreign foods. We love a kid-friendly chewable probiotic as well.
If you need any immunizations or vaccinations, make sure to see your doctor at least 6 weeks before you leave the country since some vaccines don’t reach the highest protection until about 6 weeks after you get the shots. Some vaccinations you might need could include: Hepatitis A and B, Influenza, Measles/mumps, Meningococcal meningitis, Pneumococcal, Polio, Rabies, Tetanus and Diphtheria, Typhoid, Varicella, Yellow Fever, and Malaria.
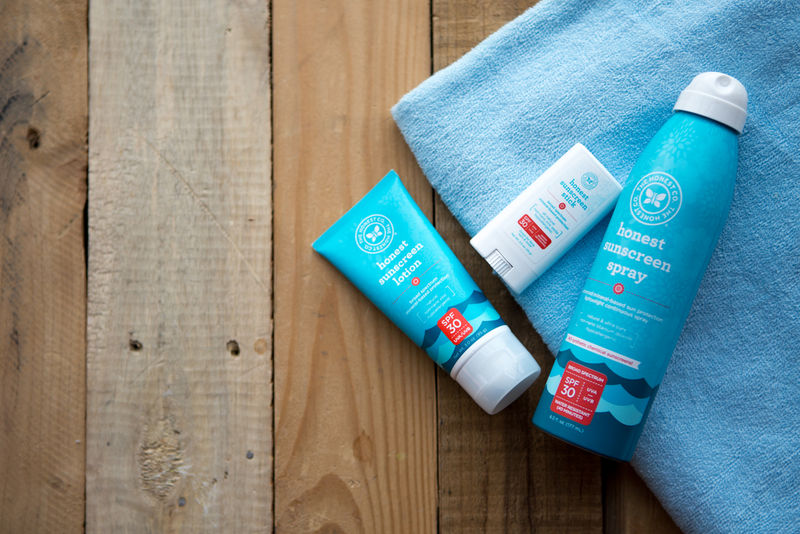
Photo courtesy of Trend Hunters.
No matter where you are traveling to, make sure you bring sun protection in the form of sun protective UVA/UVB clothing, sunglasses, and sunscreen. Sunscreen should have at least 6% zinc oxide and/or titanium oxide as the active ingredient (these ingredients carry the most protection and act as a physical barrier on the skin). They are also minerals and not chemicals, so they are safer for your skin and the environment. Also, try to wear rash guards (or UVB/UVA clothing) in the water which will offer the best protection and minimize risk to environment.
We love Babo transparent zinc-based sunscreen, as well as a sunscreen safe for coral reefs and places where marine life resides. This Badger bug-repellent sunscreen is a wise idea too, if you are going somewhere there are a lot of mosquitoes. See what kind of sunscreens make the top of the list for safety and effectiveness.
This seems like a no-brainer but might be your best protection to staying healthy while traveling. Think about the amount of germs lurking around just in the airport and airplanes alone where so many people touch such as door handles, dining trays and tables, ticket kiosk, ATM, security-line bins, etc. If you can’t wash your hands often, carry hand sanitizer with at least 50% alcohol or take disinfecting wipes with you. If you can’t wash your hands often, at least be mindful of not touching your hands to your nose and mouth.
Dreaming of going somewhere tropical and lush like Hawaii, but a bit off-the-beaten path, rugged, and more economical? Costa Rica is the ultimate family adventure vacation!
Costa Rica is one of the best places to take kids if you’re looking to get outside the country and don’t want to break the bank. “Pura Vida” is the motto of Costa Rican natives, or Ticos, which means “Pure Life” and they embody this motto in all walks of life. The minute we landed in Costa Rica the first time, we fell in love with the landscape, the culture, the wildlife, and of course, the adventure.
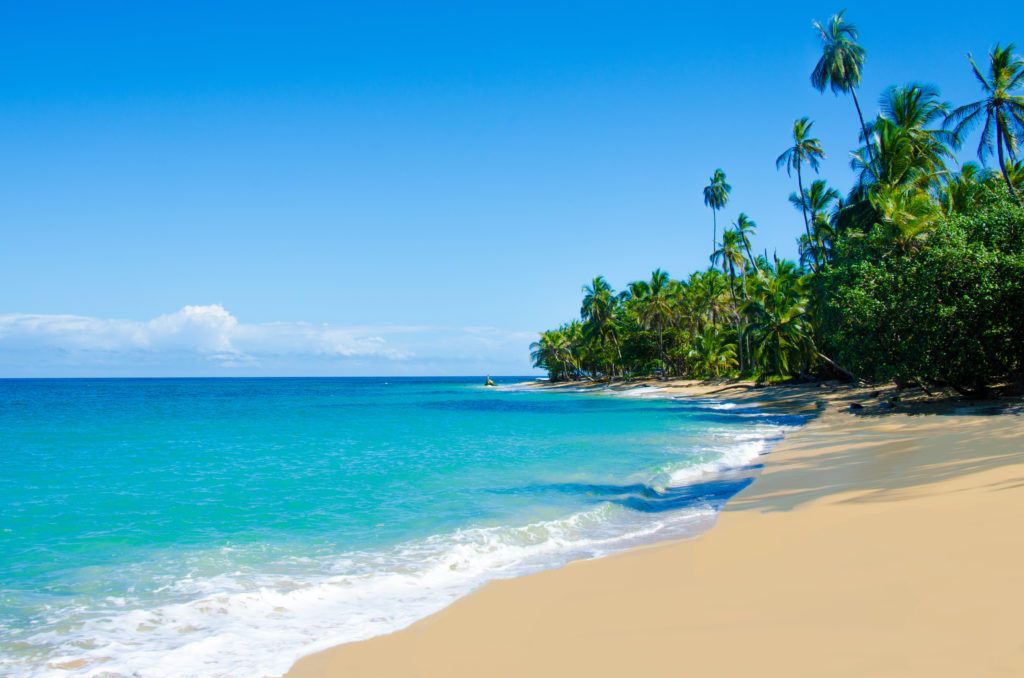
A slice of paradise
We loved the idea of going to Costa Rica so we could expose our kids to a third world country and culture, but go somewhere safe and family-friendly. Costa Rica is extremely safe, clean (air and water), and is rich with biodiversity and geography.
Home to one of the most active volcanoes in the world, “Arenal” along with many other volcanoes, lush jungles and thick cloud forests galore (more variety of flora and fauna than anywhere on the planet), and pristine beaches for miles (both on the Pacific and Caribbean side). Plus nowhere else in the world can you find such abundant wildlife packed into a small, geographical area (over 500,000 different species!).
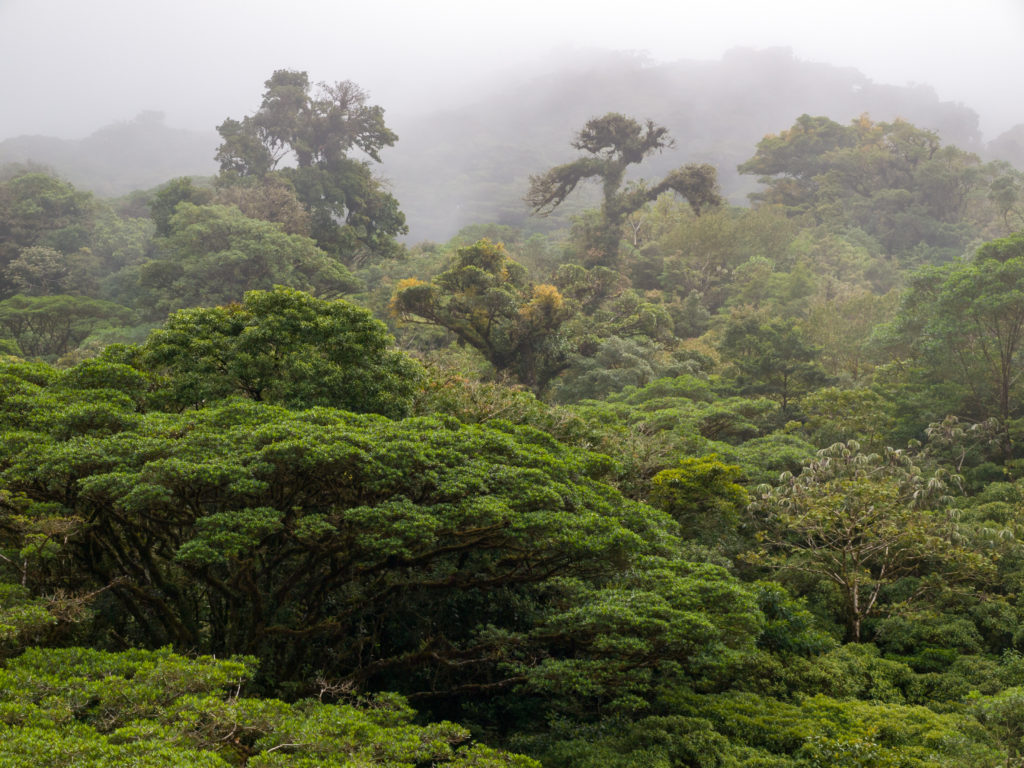
Cloud forests galore
What drew us to Costa Rica the most was all the activities we could do, even with young kids. Costa Rica is known across the world as one of the top destinations for adventure. Only in Costa Rica, can you zipline through cloud forests (some of the longest in the world), go white water rafting in Class V rivers, rappel down waterfalls in the jungle, surf world-class beaches, all in a condensed area! Costa Rica is truly an adventure-seeker’s paradise which pretty much translates to our kind of place.
One of the hardest decisions to make when planning a trip to Costa Rica is when to go. Costa Rica has two distinct seasons, a “wet” season and a “dry” season. In the months of Aug-Oct, rainfall is the highest across the country. If you want the best surf conditions though, this is the most ideal time to go since these storms bring giant swells.
Accommodation prices are quite a bit lower during these months (considered the off season), so if you don’t care about rain and want the biggest bang for your buck, go this time of year. During the “shoulder” months of May-July and Nov, rain is still plentiful, but not as wet as during the wet months of Aug-Oct. And then “dry” season (or “peak” season) is between the months of Dec-April.
You will still see rain even in the dry season (it is the tropics, after all), but it is definitely less wet this time of year. Accommodations are more expensive during peak season (especially during the holidays) and they fill up fast, so book far in advance. Some places even enforce two or three day minimum stays. Also, beach towns fill up with domestic tourists this time of year since this season is considered Costa Rica’s “summer”.
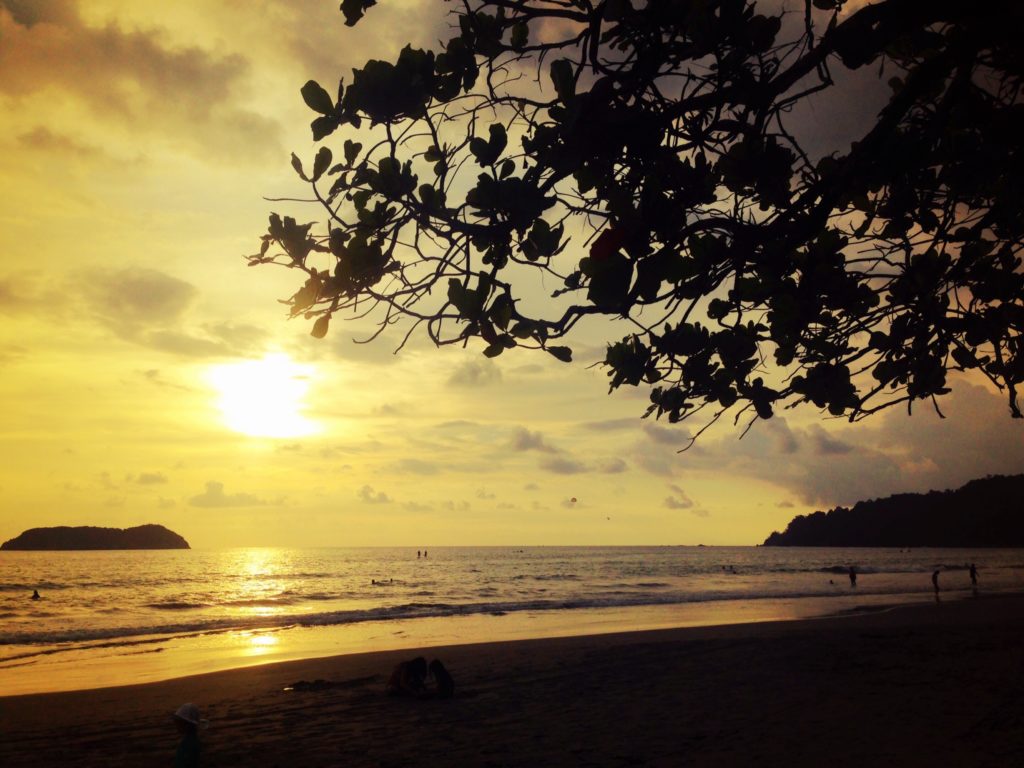
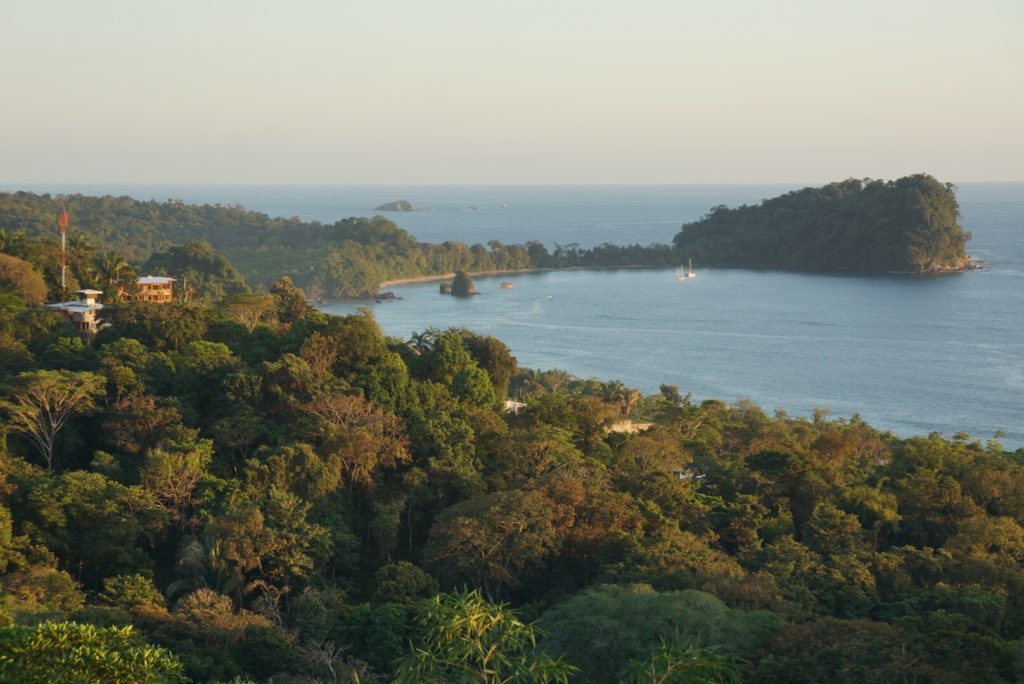
Sunset in Manuel Antonio
On our first trip to Costa Rica, we choose to go during peak season (January), mostly because it worked better for our schedule. We had a little rain in the mountains/jungle, but not enough to put a damper on our activities fortunately. We didn’t have any rain on the Pacific coast where we spent a week near the beach. It was quite hot there actually!
Once you’ve figured out when to go to Costa Rica, narrowing down where to go will be the toughest decision because there are so many incredible places to go! One thing you should know about Costa Rica is even though it is relatively small country (about the size of West Virginia or Denmark), it is impossible to see the whole country in a relatively short amount of time.
Many of the roads in Costa Rica aren’t paved highways, often require a 4X4 (more on that later) and depending on the season, may be flooded due to rain. Believe it or not, Costa Rica is very mountainous and rugged, so many of the roads are windy and take a while to travel to/from by vehicle. With that being said, planning WHERE to go in Costa Rica is essential because you want to maximize your time and not spend most of it driving (unless you enjoy that sort of thing).
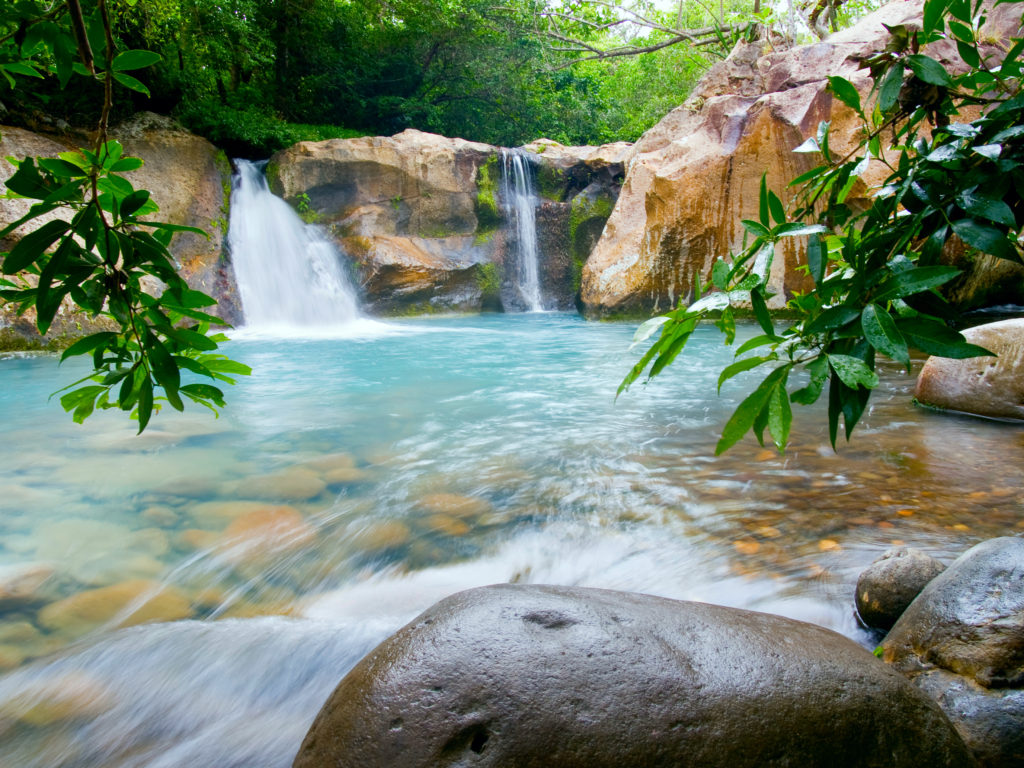
Rincon de la Vieja National Park
The main areas of Costa Rica to visit are: the Guanacaste region (Northern Pacific), the Nicoya peninsula (just south of the Guanacaste region), the Puntarenas region (Central and South Pacific), San Jose (the capitol), Alajuela (Northern Central region) and the Limon region (Caribbean side). Each region is unique and worth visiting, so figuring out what kind of sights you want to see and what activities you want to do first will help you narrow down your choices of where to go/stay.
Ultimately since this was our first trip to Costa Rica, we narrowed it down to two places–the La Fortuna/Arenal region and the Manuel Antonio region in the Central Pacific coast region.
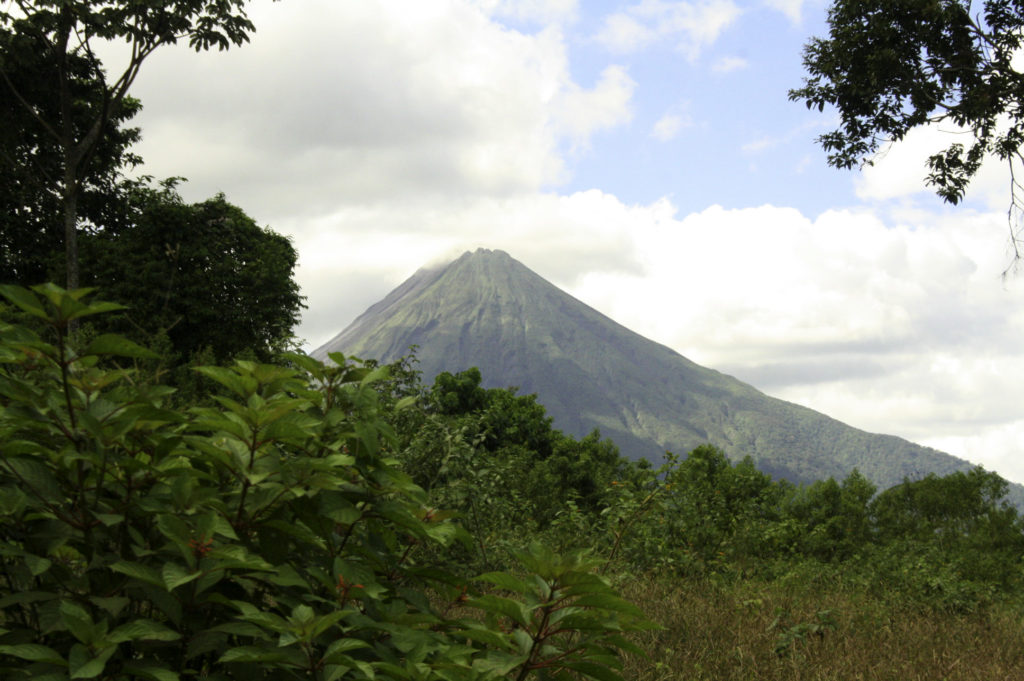
Volcano Arenal, one of the world’s most active volcanoes
There are plenty of other amazing places to visit in Costa Rica. The North Western coast is where the best surf action is. The Caribbean coast is quieter with quieter beaches, the central region south of the capitol (San Jose) is known for its rivers (world-class river rafting), and the most southern region on the Pacific coast has the most diverse wildlife on the planet (especially Corcovado National Park).
We simply couldn’t see it all in two weeks, but we will most certainly be back to explore more!
For this trip, we decided to mix both a resort and an Airbnb. We planned it so that we stayed in a resort first in Arenal and then spent the second half of our trip in an Airbnb rental in Manuel Antonio.
I researched a ton of resorts in Arenal. We didn’t want to pay top dollar, but we also wanted a true resort experience. We decided on Arenal Springs Resort & Spa, which was awesome. We had beautiful hot springs to swim in (including a swim up bar!), waterfalls, a good variety of delicious restaurants, gorgeous suites (the bathroom was our favorite!), and fantastic views of Volcano Arenal.

Upon arriving to the resort (after a red eye flight in which none of us hardly slept, and a 3 hour shuttle drive to Arenal), this kid immediately got his swim trunks on and headed to the pool.
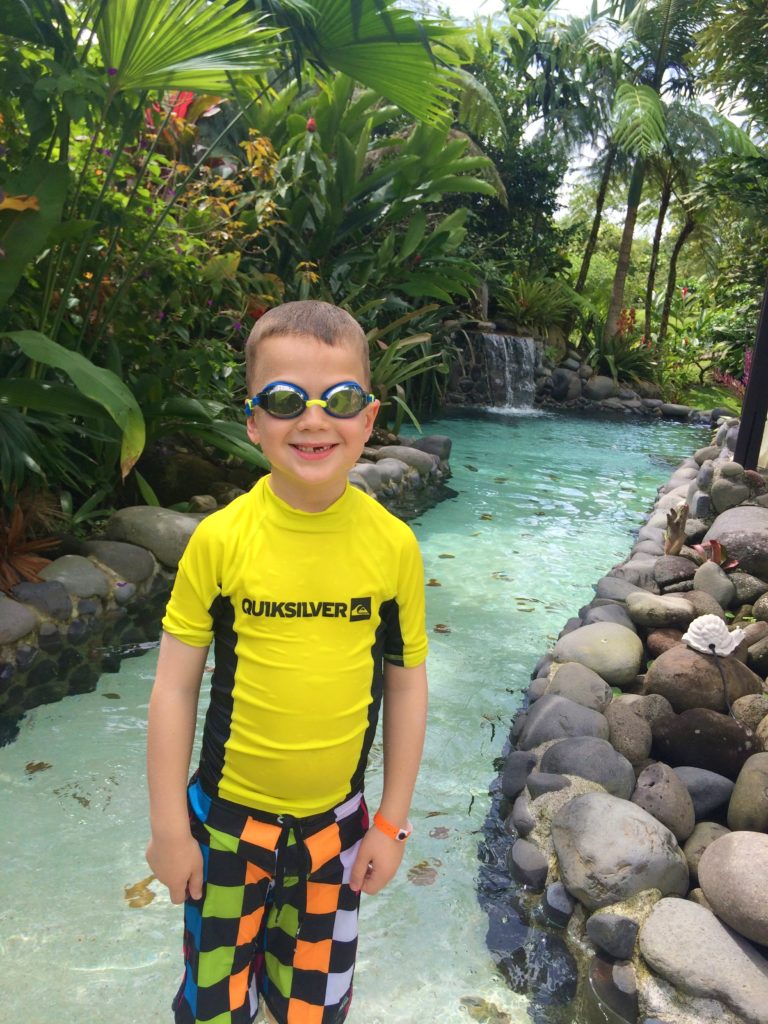
Happy camper at the the pool at Arenal Springs Resort.
We also considered a couple other resorts, but there were several that were already booked such as Tabacon Grand Thermal Resort. We spent half a day here (we got the day pass which includes access to the hot springs/garden and includes lunch or dinner). Tabacon is AMAZING! Definitely consider a day pass here if you don’t stay at the resort.
We also looked into Lomas del Volcan, which is similar to Arenal Springs Resort, where we stayed. I have also heard great reviews about this eco-lodge, Arenal Oasis Eco Lodge and Wildlife Refuge, which I think is a great option for families or visitors looking for something more adventurous and budget-friendly (think tree houses!). Make sure to use Booking.com for the best rates on all resorts!
Yes, this place is real. Did I mention Garden of Eden??
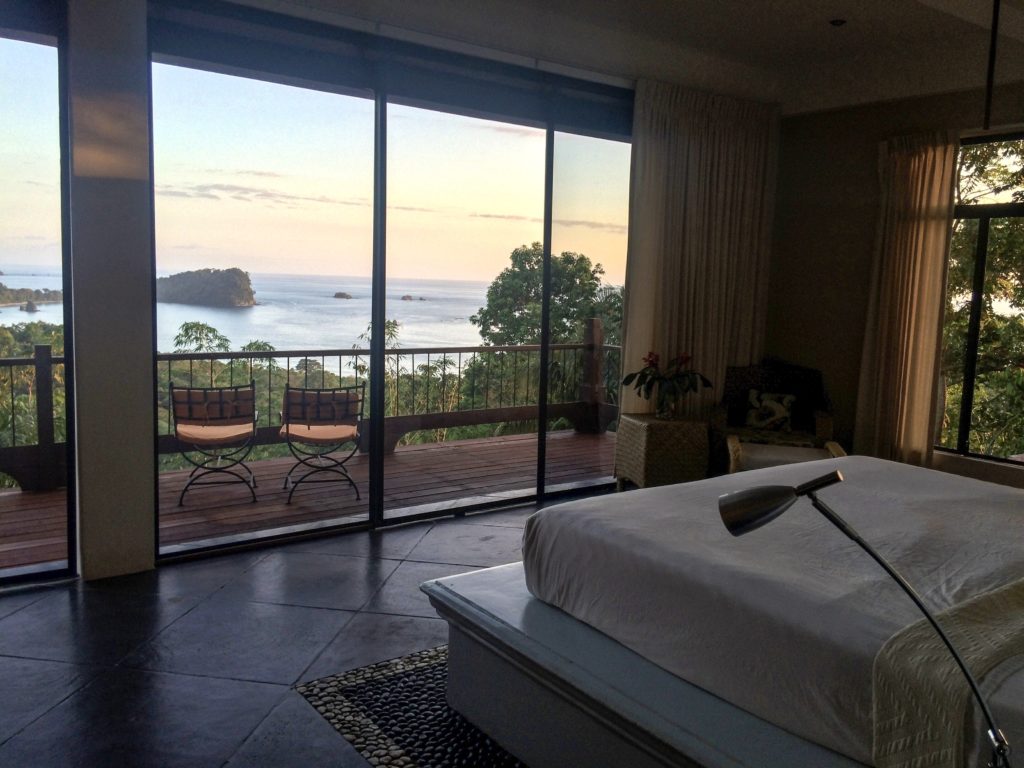
As I mentioned previously, we decided to use Airbnb for our rental in Manuel Antonio (especially since there were 11 of us!). We rented a house named “Casa Samba” because we wanted more room and quality together time since at a resort we were all in separate suites. This house boasted 5 stories, a guesthouse, a pool, Jacuzzi, a large outdoor patio/living area, game room, an outdoor shower, and our favorite–amazing views overlooking the ocean and beaches of Manuel Antonio. The sunsets were stunning every night as we dined on the patio together as a family watching the sun go down.
Flying to Costa Rica was easy, about a 6 hour flight from Denver. We use lot of different tools to book the best deals on flights including Momondo, Sky Scanner, and we also subscribe to Scott’s Cheap Flights, which show the most amazing deals out there! Our friends over at Wanderlust Crew have some other great tips on finding the best deals for families (how to fly for almost free!). We ended up scoring flights to Costa Rica for $475 roundtrip, which is a smokin’ deal considering we left during peak season (Dec 31).
As for transportation around Costa Rica, this was also something we researched a lot since there are many options. We knew we would need a rental car in Manuel Antonio since we would explore a broader area and go off-the-beaten-path. Everything we read said to get a 4 X 4 and that was definitely the right decision! We did a lot of research and ended up renting from Nomad America because they offered amazing 4 X 4’s for an affordable rate and even included some extras like boogie boards and coolers!

In La Fortuna, we opted for taxis and shuttle buses since the tours we chose all included pick up/drop off. The major transportation decision we had to make was how to get to Arenal from San Jose (where we flew in from), and then from Arenal to Manuel Antonio, and Manuel Antonio back to San Jose.
We strongly considered flying via Sansa, which is a small puddle jumper airline. It’s a great option because flights around Costa Rica are short (less than a hour) and fairly inexpensive, but ultimately we decided not to since some of our luggage would be over their allotted max weight of 40 lbs. If you want the quickest mode of transportation to and from different areas of Costa Rica, Sansa is the best option.
We decided we didn’t want to mess with a bus since it would take longer, and we didn’t want to worry or stress about how to navigate some of Costa Rica’s mountainous back roads with a rental car, so we chose to hire a private shuttle transfer and that was the best decision we could’ve made!
For our large extended family, we were able to request a large van to fit all of us and it cost around $300 for each transfer (not bad considering there were 11 of us). Our drivers were all great, spoke good English, and taught us a lot about the culture and country. It was also a great way to see the countryside and having someone else drive was less stressful, so we didn’t have to worry about getting lost!
We would definitely recommend a company like Costa Rica Shuttle, which was very affordable and professional. The first transfer (Arenal to SJO) was roughly a 3 hour drive, the second transfer (Arenal to MA) was 6 hours, and the last transfer (MA to SJO) was 3 hours.
Now, let’s get to the good stuff.
The FUN.
One thing is for sure about Costa Rica: there is no shortage of activities. People have asked us all the time if Costa Rica is a kid-friendly destination and the answer is a resounding YES! In fact, if you ask our kids where their favorite place they’ve been is, they will probably say Costa Rica. If you want total relaxation, you can find it in Costa Rica. If you’re into adventure and outdoor activities, you will find everything you want in Costa Rica. If you are into wildlife and culture, you will also love Costa Rica.
We spent two weeks there and even though we packed a lot of activities in, we still feel like we just barely scratched the surface. With that being said though, we would go back and repeat every activity that we did.
I’ve decided to break up the activities that we chose into the two main areas of Costa Rica that we visited. We could’ve done some activities in both places (for example, rafting and zip lining), but we carefully chose the activities that we had researched were the best for that area.
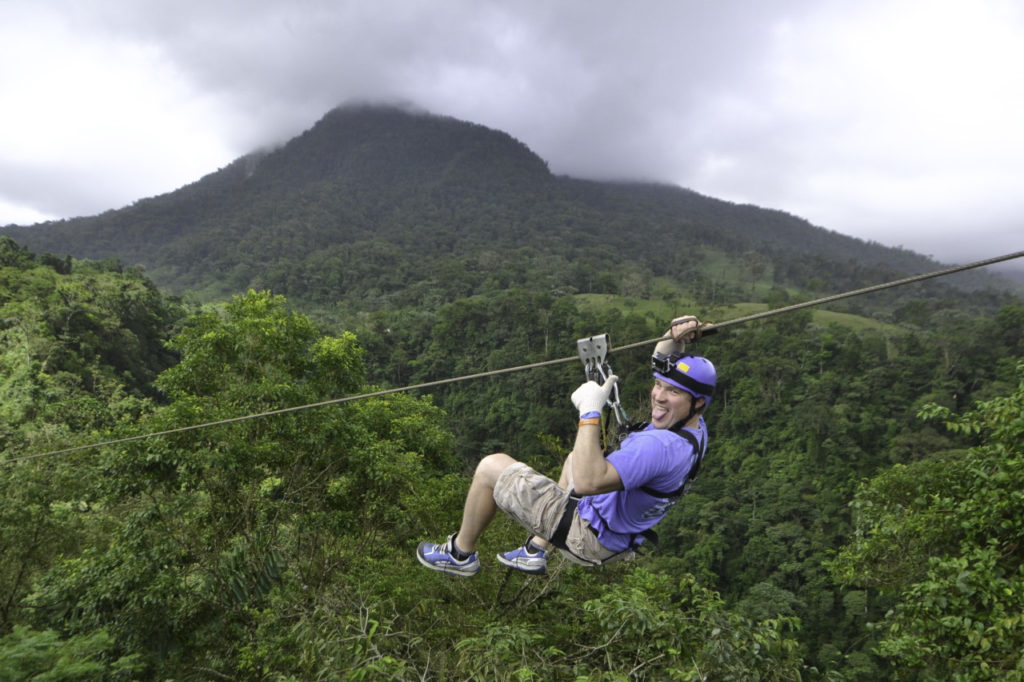
Zip lining
Costa Rica is known for having some of the best zip lining in the world, in fact, they even started the sport! The country boasts some of the longest zip lines too, and we had read and heard from many sources that Arenal had the country’s best zip lining. We thoroughly researched companies because safety was important to us. Because we had kids with us, we only looked into companies that met our kids age limitations (our youngest was 6 at the time). We ended up picking Arenal Mundo Aventura because our boys could both go, it was rated high on Trip Advisor, and the tour had some of the longest zip lines (some even going over top waterfalls!).
Zip lining in the jungle below Arenal above waterfalls
This tour was so much fun. The tour operators picked us up at our hotel, fitted us for our equipment, did a very thorough safety presentation, and were extremely professional, friendly, and helpful throughout the tour. Our youngest was a little nervous at first, never having zip lined, but the guides eased his mind and calmed his nerves, and he ended up loving every second of it.
Because our boys weren’t heavy enough to get down some of the zip lines by themselves, they were required to go with a guide for most of the zip lines. However, they got to do a few zip lines on their own, so they were excited about that! We were able to ride down 11 zip lines, some hundreds of feet off the jungle floor and over waterfalls. The tour ended with an educational/cultural presentation on the native tribes of Costa Rica which was really cool too!
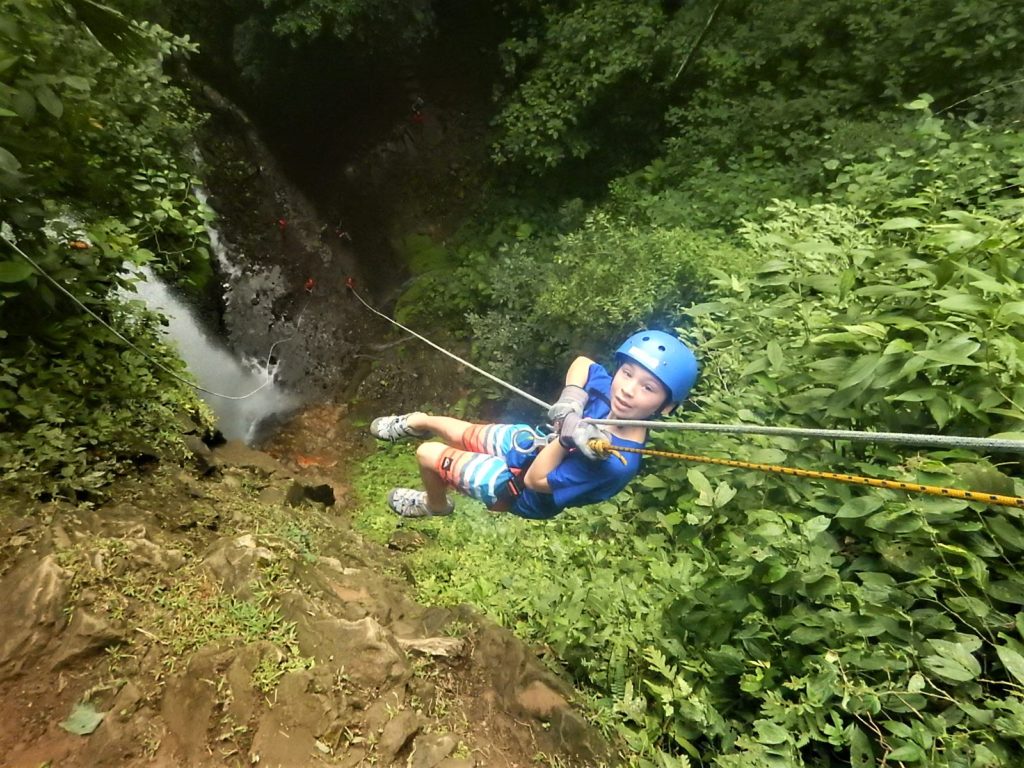
Rappelling/Canyoneering
I will be honest, if you have an extreme fear of heights, this tour might not be for you (unless you want to conquer that fear!), Hands down, this was our favorite tour of the whole trip. Packed with adrenaline, and totally out-of-the-box and adventurous. Basically, this tour involved rappelling down 4 waterfalls in the jungle, the tallest being about 200 ft! We also hiked through the jungle, climbed up rocks and shimmied through canyons.
The guides on Pure Trek made the experience too–they were fun, witty, helpful, and encouraging. Our youngest chose not to go on this tour, but our oldest boy did and he wasn’t scared one bit. He loved every minute of it and couldn’t wipe the permanent grin off his face!
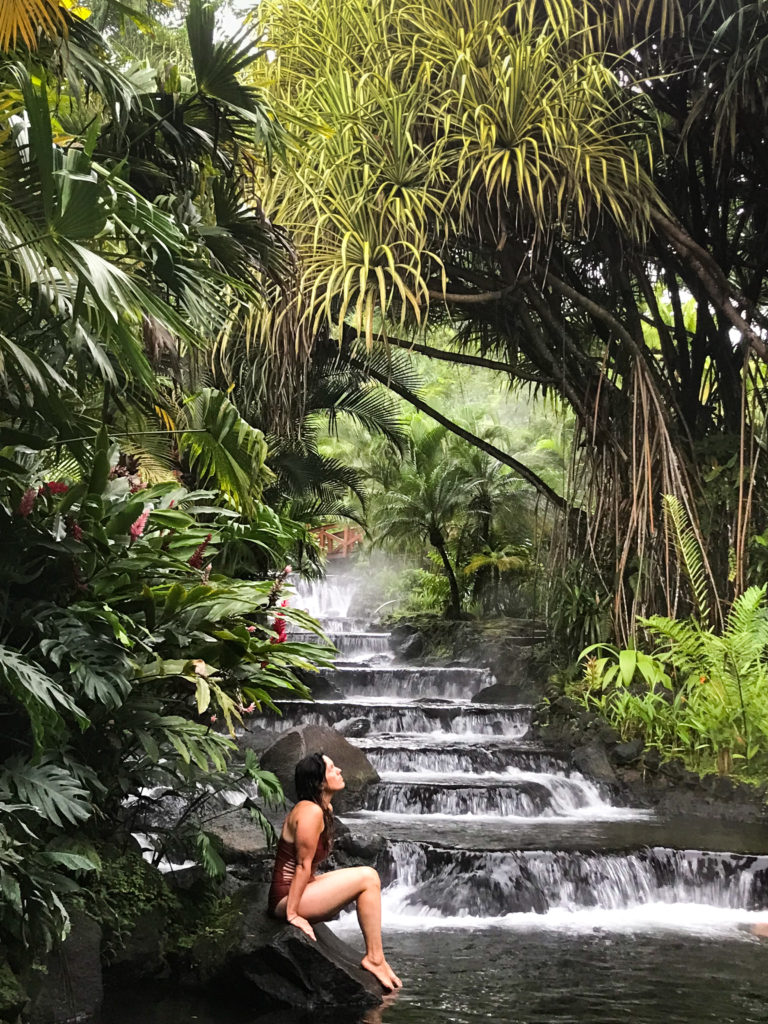
Tabacon Hot Springs
I wrote about this under Accommodations, but basically we purchased a Tabacon Hot Springs Day Pass and spent an afternoon (after canyoneering) soaking and playing in the hot springs, walking around admiring the lush gardens, and eating the delicious buffet of typical Costa Rican cousine. It was worth every penny. Tabacon is more of a romantic destination, (at times we wished we were there without our kids!), but still fun for the whole family. We had to drag our boys out at the end of the evening!
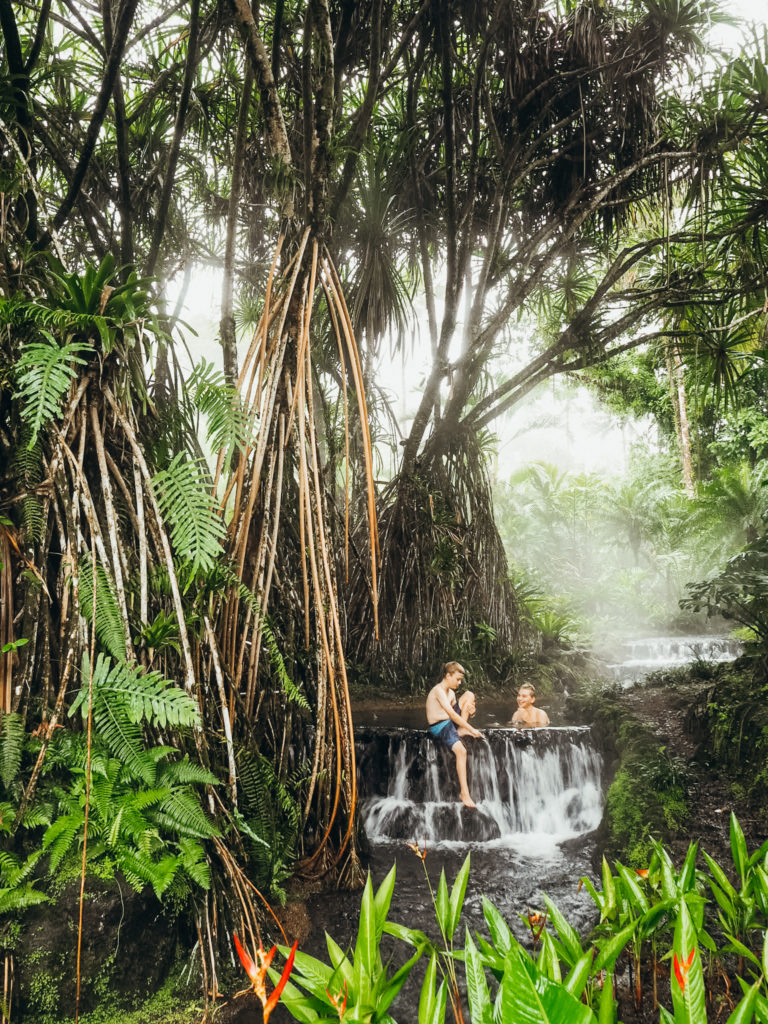
Tabacon is the perfect place to unwind and relax after a day of adventure.
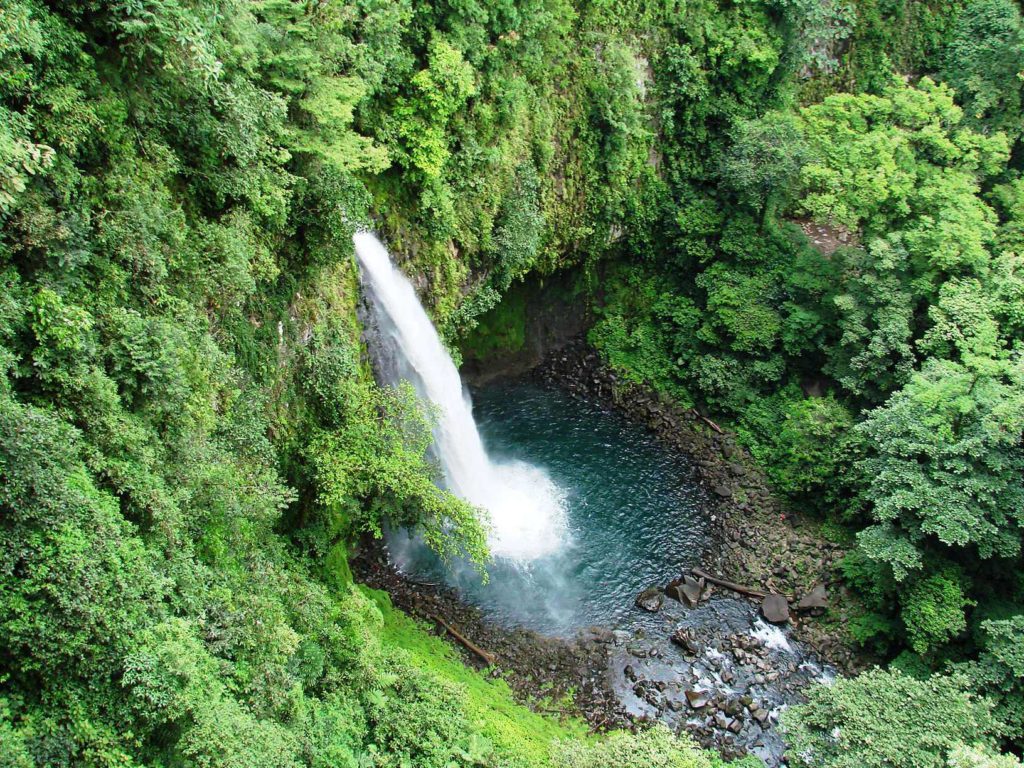
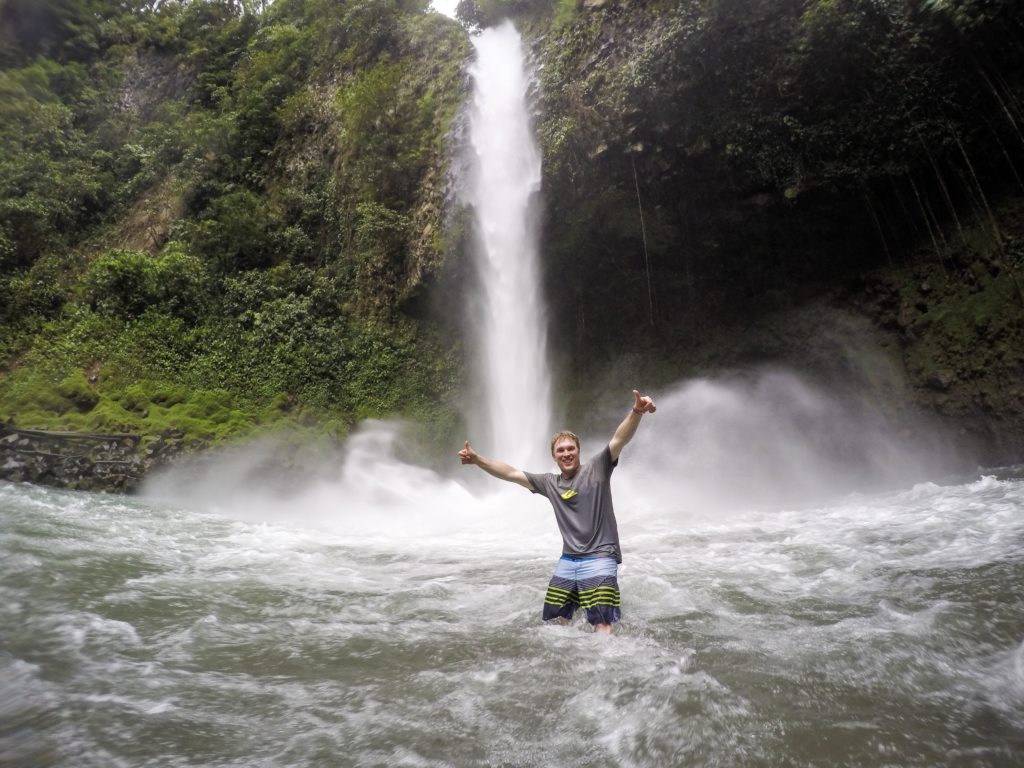
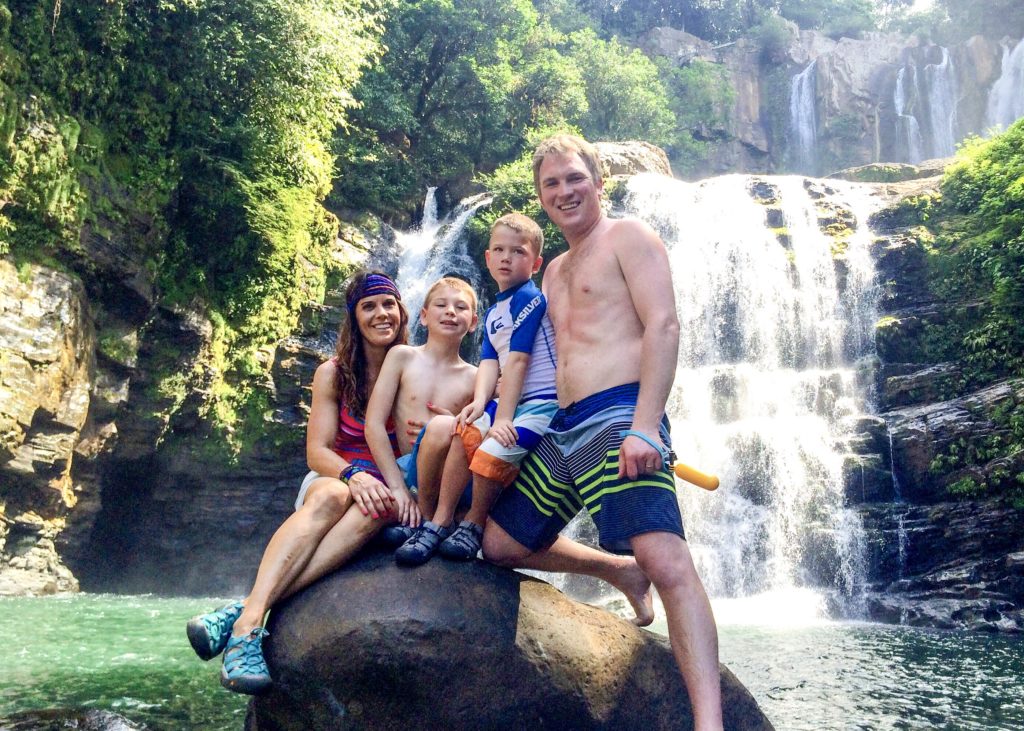
La Fortuna Falls
While the kids were hanging out at the resort where we stayed one afternoon, Eric and I decided to get a taxi and head over to La Fortuna Falls, these famous waterfalls below Volcano Arenal. It’s a short, steep hike down to the falls, but so beautiful and amazing. We swam in the pool and explored the nearby river. I would totally recommend this activity with or without kids. You can’t go to Arenal without seeing La Fortuna Falls.
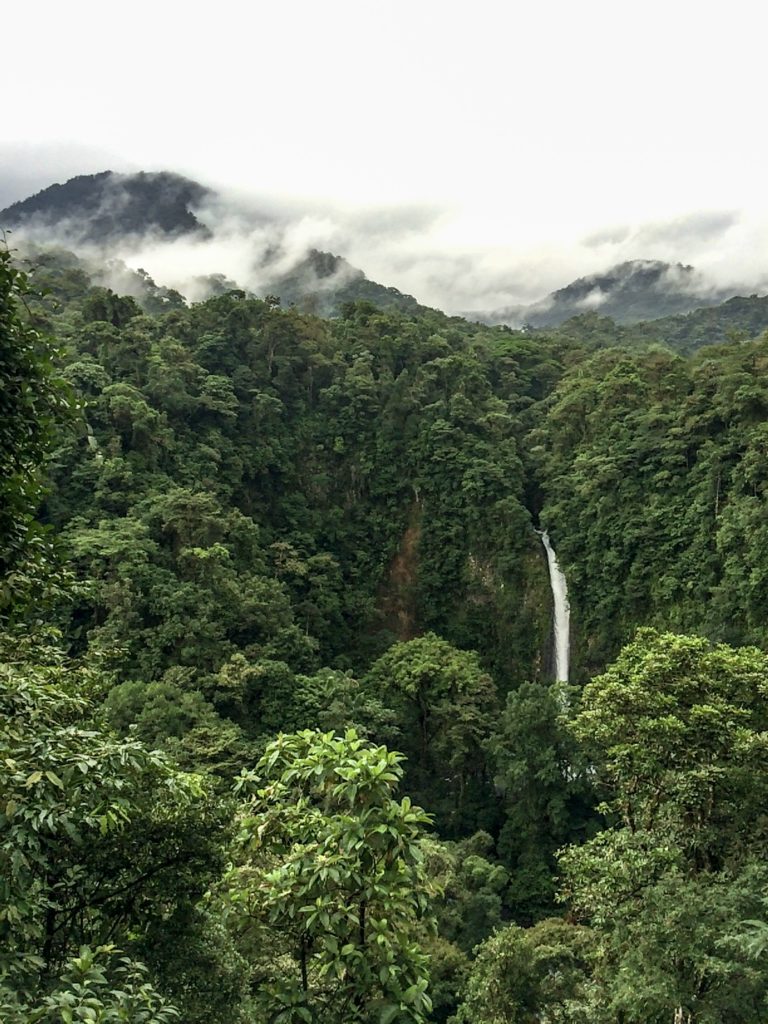
La Fortuna Falls
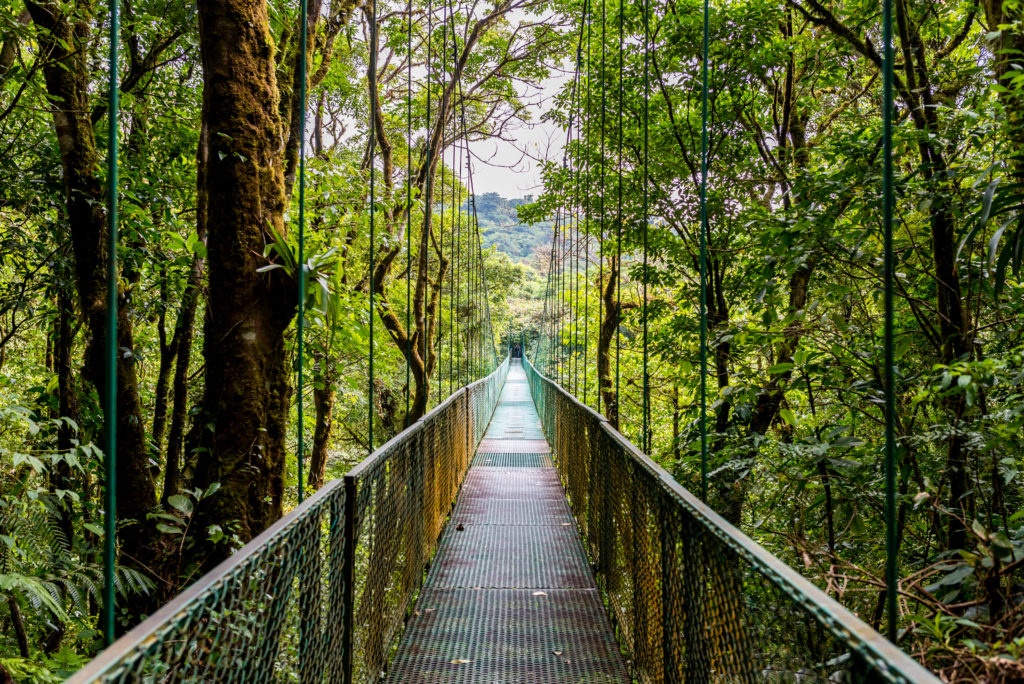
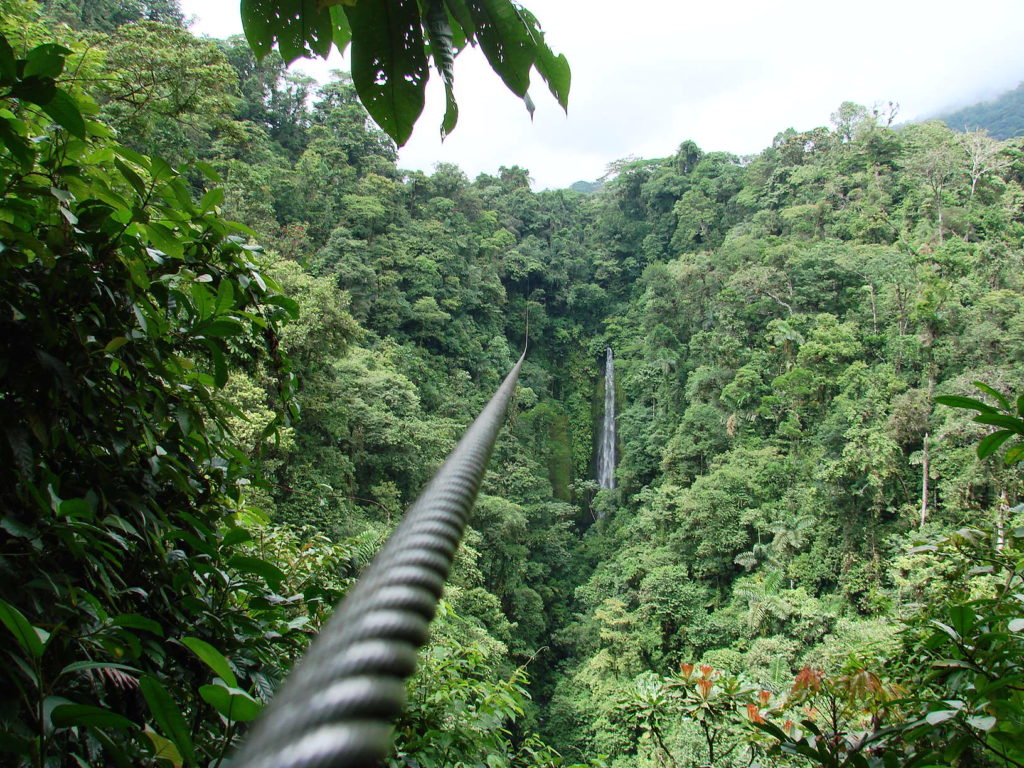
Arenal Hanging Bridges
You’ve probably seen pictures of those hanging bridges in jungles? Arenal Hanging Bridges are a definite must-go for spotting wildlife and getting a typical Costa Rican jungle hike. You could spend a half day here, or you could spent a couple of hours. Either way is worth the excursion and tour. It’s absolutely stunning!
The Mystico hanging bridges near Arenal
Proyecto Asis Volunteer Center
Proyecto Asis is a great place to spend a half or whole day. When you go, you register to be a volunteer, which means that you not only get to learn about the native animals in Costa Rica, but get to help feed and care for the wildlife here. Our youngest was able to do this and loved it! It’s a great activity for young kids that want to get up close and personal with some of the wildlife but also get involved in a great cause.
Other Activities
There are so many other activities you can do in Arenal. White water rafting (although we chose to do this on the second leg of our trip), paddleboarding on Lake Arenal, horseback riding, and hiking Arenal National Park were all activities we wished we had time for, but when we go back, will make sure to hit them up. Make sure to check out our comprehensive guide to other outdoor activities to do in La Fortuna.
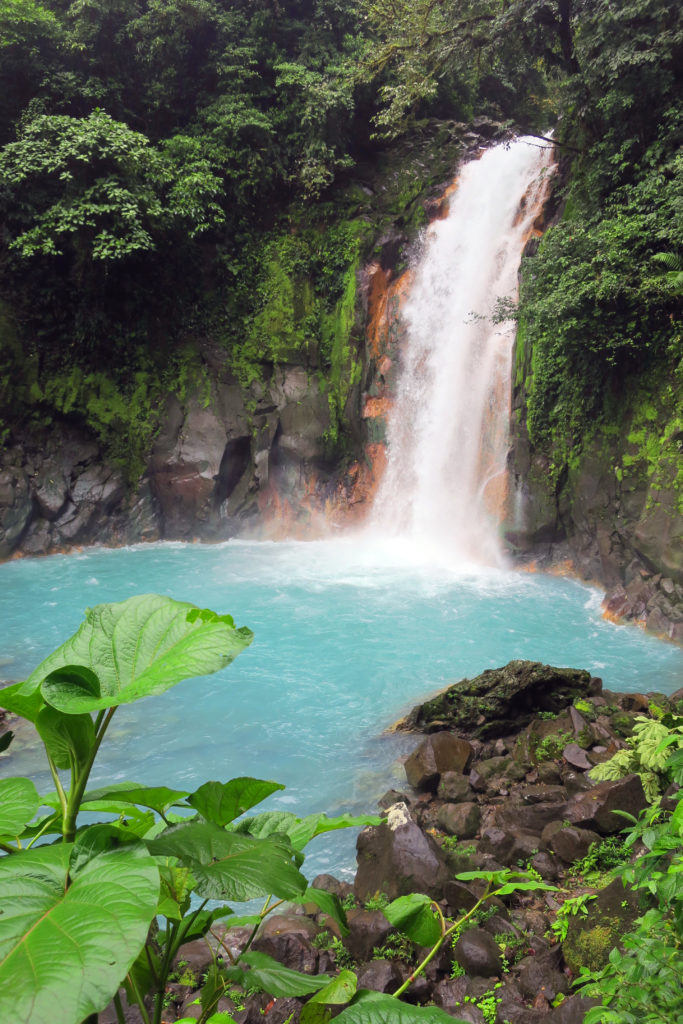
The amazing turquoise waters of Rio Celeste
Surfing/boogie boarding
Costa Rica is known for its surf, especially along the Pacific coast. Some of the best surf spots in the country are on the Northern coast, the Guanacaste peninsula, but also in Jaco which is more central along the coast, and Dominical, which is south. Manuel Antonio itself has beaches to surf, but they are best for beginners. You can take surf lessons (which is recommended if you haven’t surfed before), or you can just rent a board on any of the beaches.
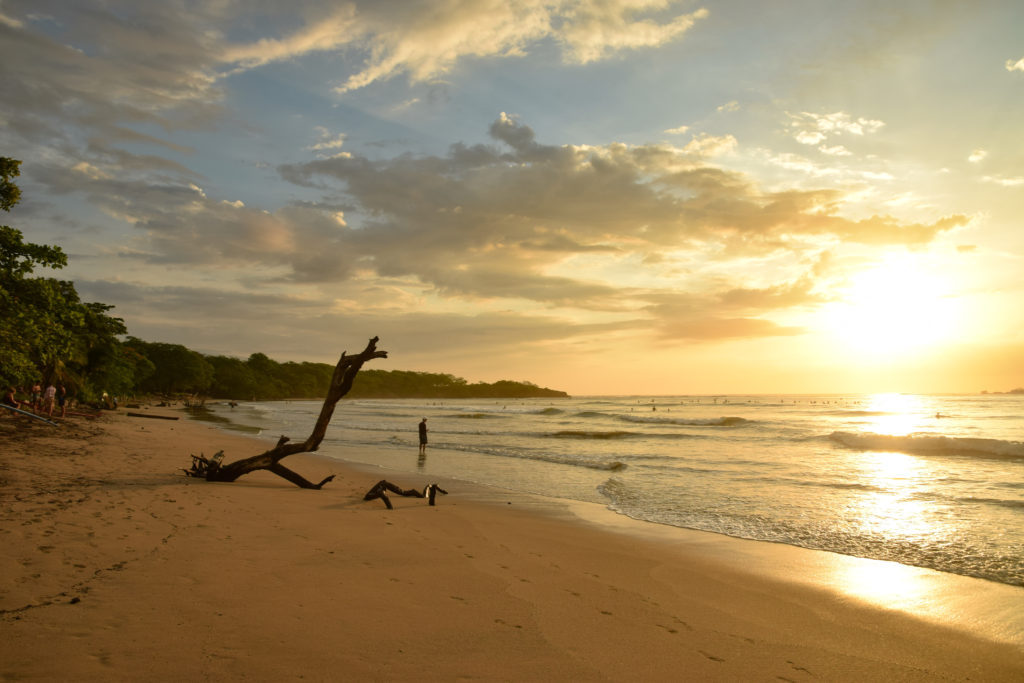
We stayed only a mile from Playa Manuel Antonio, so we spent a couple of days there boogie boarding, surfing, and playing on the beach. Other beaches for surfing in the area are Playa Dominical (1 hour south of MA), Quepos (20 min north of MA), and I have also heard Isla Damas is a great, quiet spot to surf around Manuel Antonio that is good for beginners.

One of the beautiful sunsets we witnessed in Manuel Antonio
Snorkeling
Costa Rica isn’t known for the world’s best snorkeling, but there are still some great places to snorkel and luckily, one of those places was near us in Manuel Antonio. Playa Biesanz was probably the best for snorkeling in the area, but also a bit tricky to find (we had to ask a local). It was a short hike down from the road through the jungle, but the beach was completely secluded and beautiful. We rented kayaks and snorkel gear on the beach and spent an afternoon swimming and relaxing at the beach.
If you really want to find the best snorkeling in Costa Rica, definitely book a snorkel tour to Cano Island, which is south of Manuel Antonio and off the coast a ways. You have to drive to Uvita (about 2 hours south), and get on a boat which takes you to Cano Island.
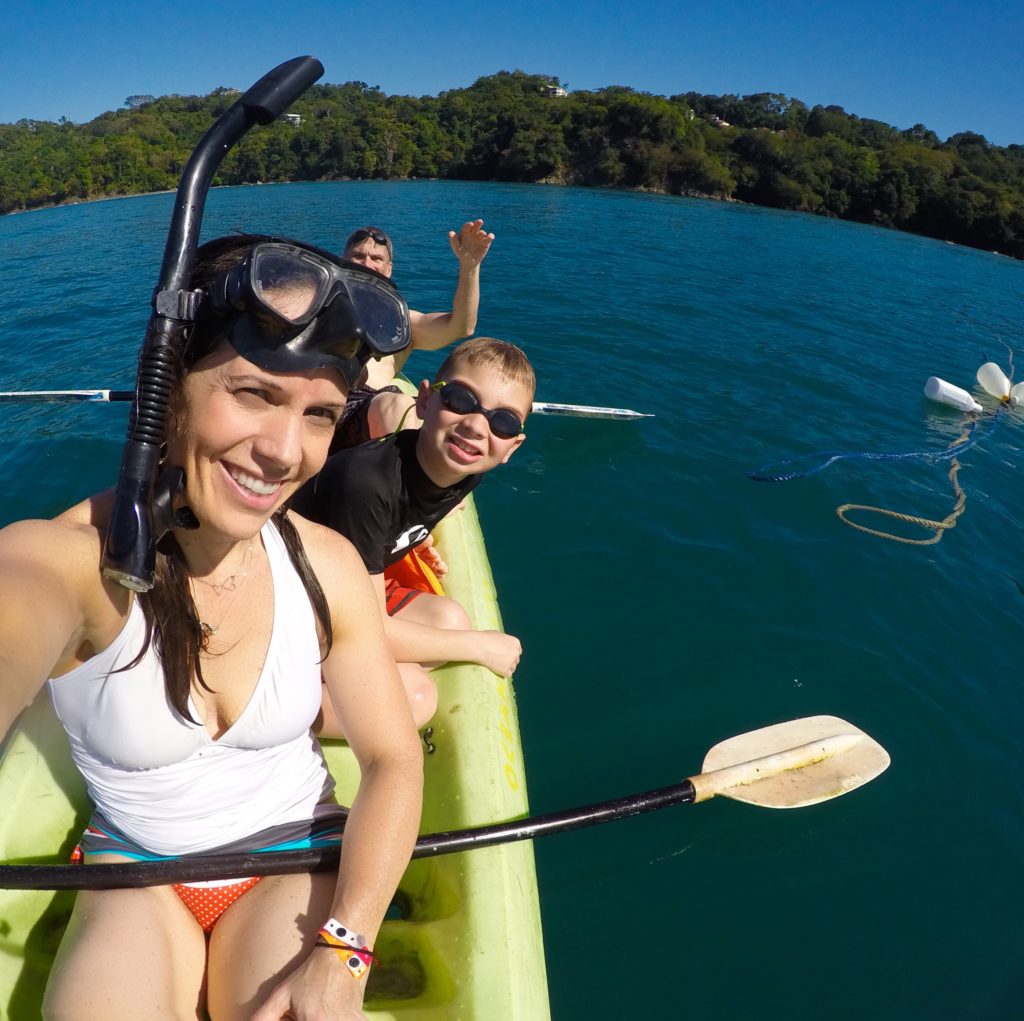
Kayaking and snorkeling near Playa Biesanz
Horseback riding
We would highly recommend going horseback riding to Nauyaca Falls. While I was researching places to see in Costa Rica, somehow I stumbled on a picture of this waterfall online and later found out that it wasn’t far from where we were staying in Manuel Antonio. And they offered a horseback riding tour to the falls! SOLD! This was the perfect activity for our whole group, adults and kids.
Our guides were patient and helpful, and the horses were calm and easygoing. This tour included breakfast and lunch too. Basically after they fed us breakfast, we rode horses up to Nauyaca Falls, where we swam in the pool and jumped off the waterfall. SO much fun! After a good hour or so playing at the waterfall, we made our way back on the horses, where we stopped to have lunch and then continued the rest of the way back. It was a full day, but one of our favorite days!
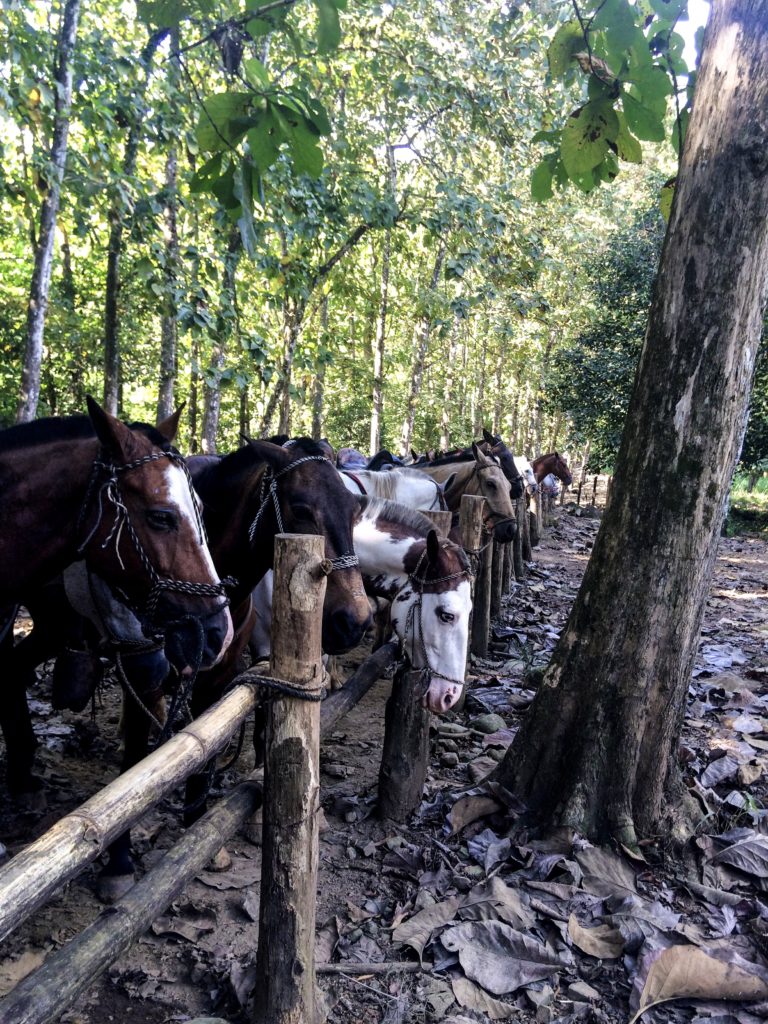
Nauyaca Falls
Whitewater rafting
There are a plethora of awesome, world-class rivers to go whitewater rafting in Costa Rica. Even though we were there during the dry season, where the rapids aren’t generally as fast, we had so much fun on the Savegre River with Amigos del Rio. The tour we did was Class III rapids mostly, with a few IV spots. The group we went with was very lively and our guides were full of personality too, which made this tour all the more fun.
The river was a mix of rapids and calm sections, where we would jump off the raft and swim around. We played in waterfalls and our guides fed us a great lunch too. At the end of the tour, we stopped at this scenic overlook of a palm forest, and it was BREATHTAKING as we watched the sun descend over the jungle.
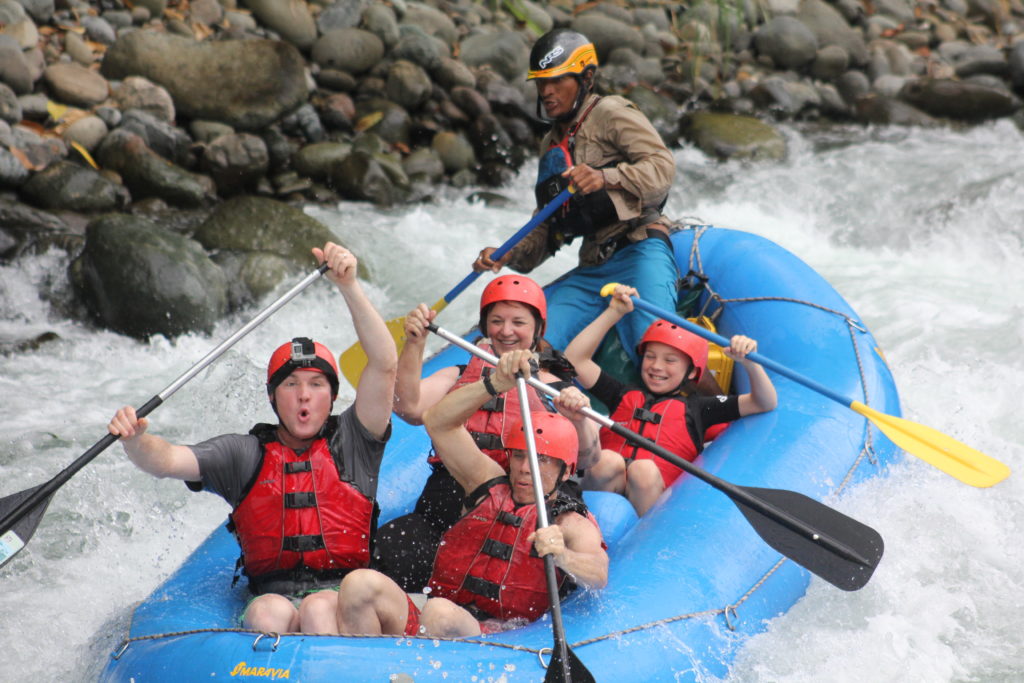
Rafting the Savegre
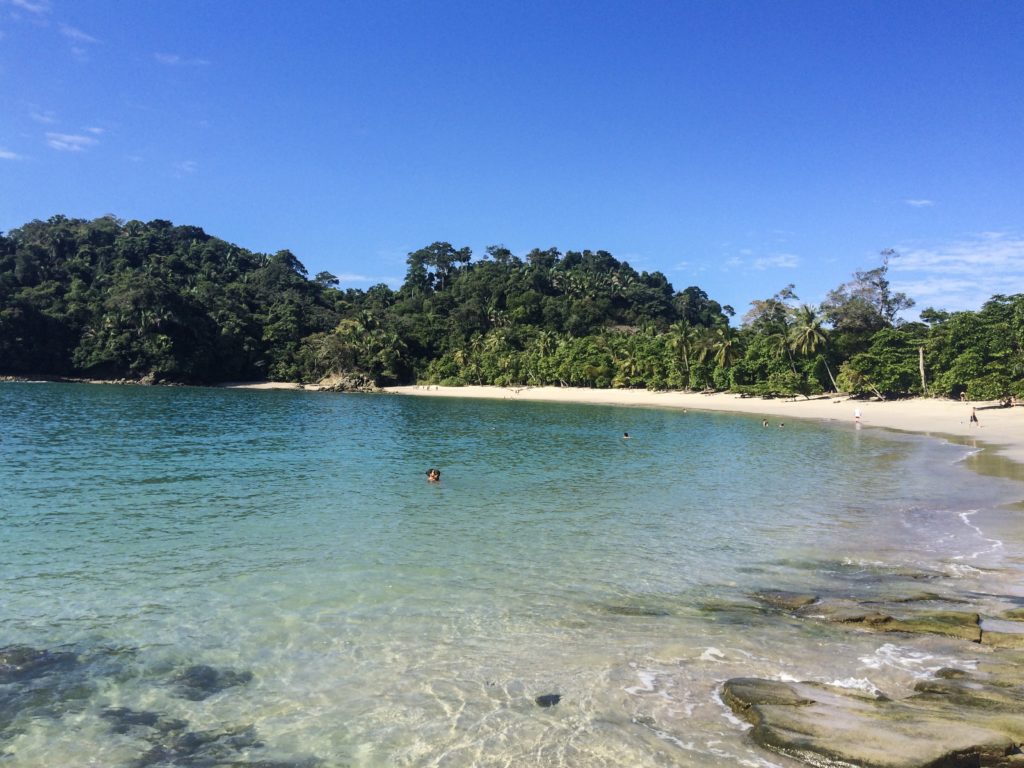
Manuel Antonio National Park
You can’t go to Manuel Antonio without going to the National Park. This is one of the few places in the country where the thick jungle meets the white, pristine beaches. There are 12 small islands included within the park, gorgeous beaches (rated some of the most beautiful in the country!), but the wildlife is the real show stopper. You can take a guided tour within Manuel Antonio Park or go on your own. A guided tour is recommended if you want to spot the most wildlife and learn about this unique park.
Manuel Antonio National Park as seen from our rental home
Other Activities
As it was in Arenal, we simply couldn’t fit in everything that we wanted to do in a week’s time in Manuel Antonio. But snorkeling at Cano Island, whale watching or kayaking through the mangrove forest in Marino Bellena National Park are recommended. Make sure to check out our post on other things to do on the Southern Pacific coast if you find yourself spending more time on the Southern coast.
As mentioned previously, Costa Rica is home to more than 500,000 species (300,000 of them are different bugs). For such a small country, Costa Rica’s wildlife takes up 4% of the world’s species! Nearly 900 bird species inhabit the skies of Costa Rica, which is more than in the U.S. and Canada combined! Many of Costa Rica’s species are endangered too and the country goes to extreme measures to protect its wildlife and biodiversity.
While we were there, we saw three-toed sloths, several different species of monkeys (mostly Howler and Capuchin), toucans, crocodiles, iguanas, quetzals, poison dart frogs, macaws, and lots of beautiful butterflies. There are many wildlife parks where you can get up close and personal with some of the unique species found in Costa Rica. Parque Nacional Manuel Antonio, Parque Nacional Corcovado, Parque Nacional Marino Ballena, and Parque Nacional Los Quetzales are just a few.
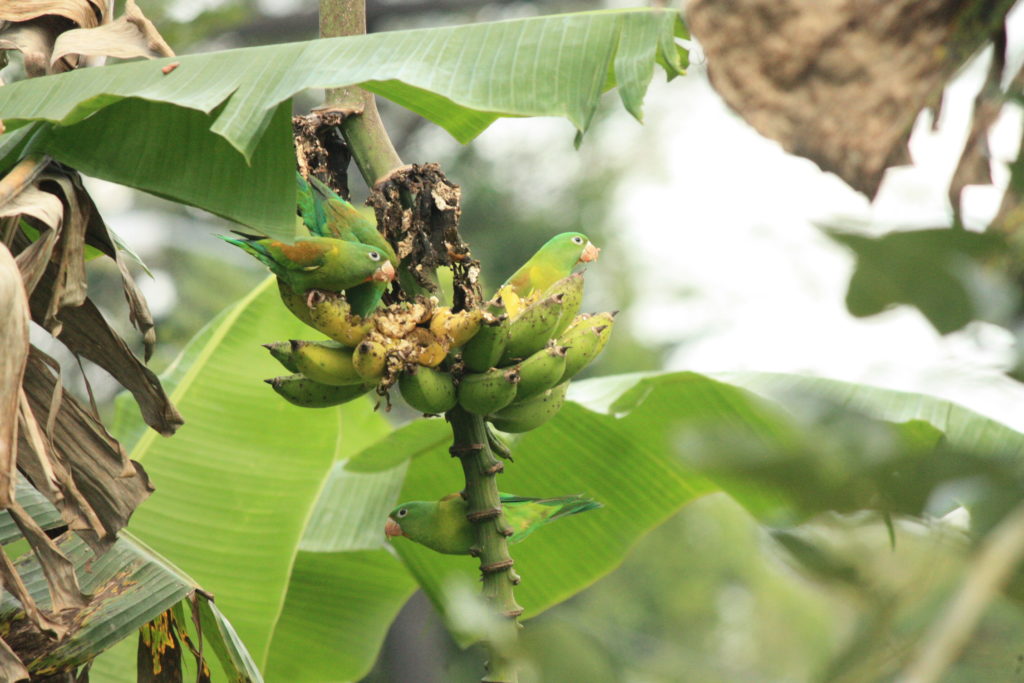
Birds eating bananas near Arenal
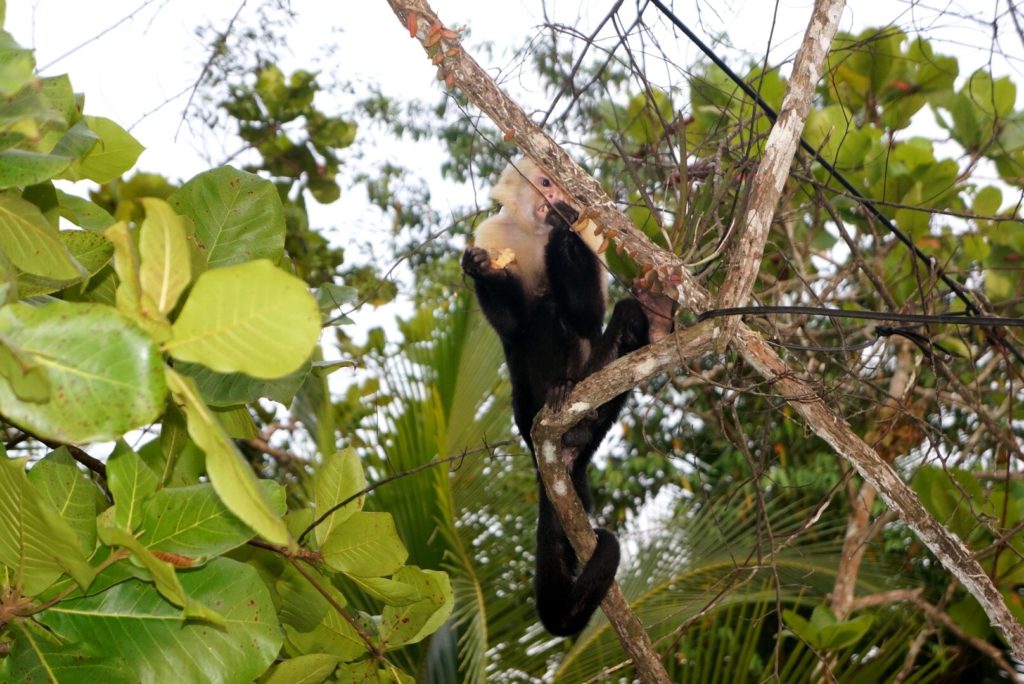
Capuchin monkey near the beach in Manuel Antonio
The richness of Costa Rica stems from the cultural diversity of its people. Costa Ricans are proud to have had more than a century of democratic tradition and more than 50 years without a military. This was abolished in 1948, and the money that the country saves from not having armed forces is invested in improving the quality of life of its citizens. This also contributes to the social peace that makes Costa Rica such a welcoming place to visit.
They know that their country is unique, and they are generally willing to offer help to those visitors, making their stay as pleasant as possible. Once you have experienced their friendliness and spontaneity, you will be convinced. Their openness and happy attitudes (living the Pura Vida) is truly contagious. We definitely experienced this and it was one of the aspects of our trip we enjoyed most!
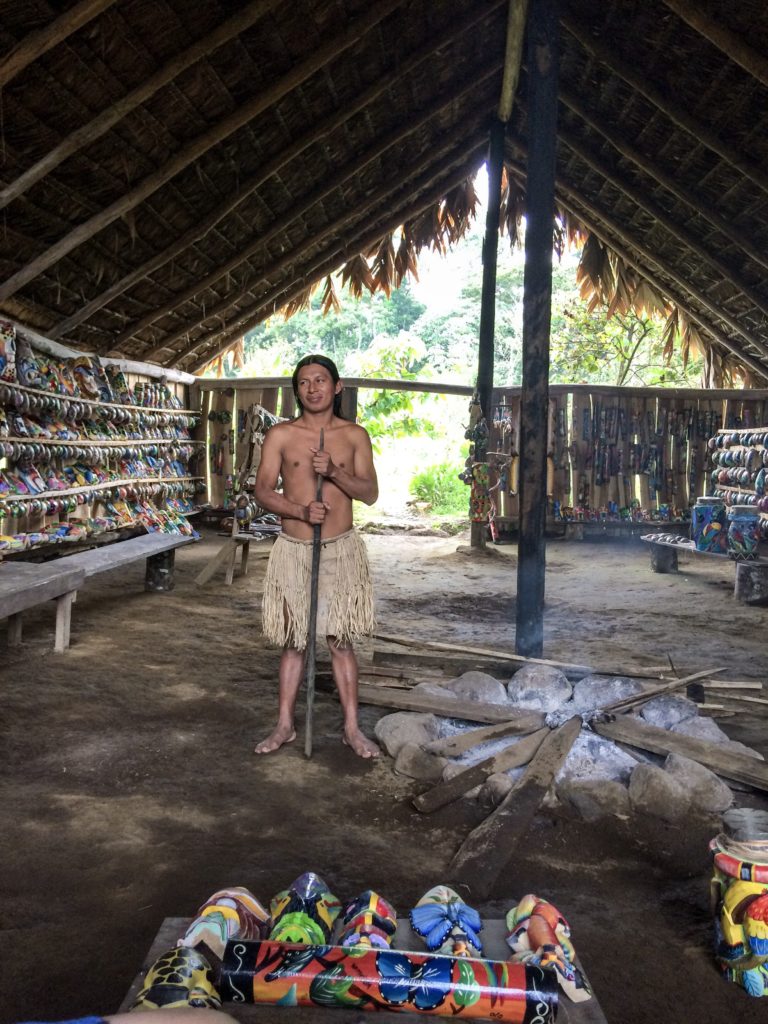
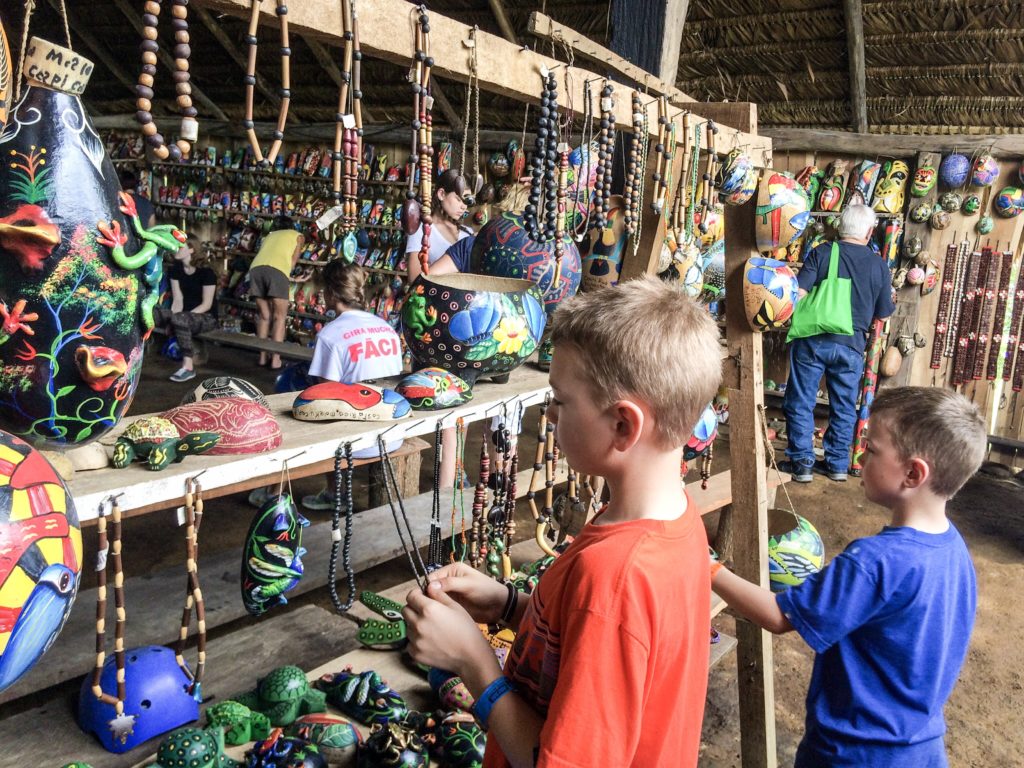
While we were there, we loved learning more about their rich history, customs and culture. There are lots of museums you can visit to learn more about their heritage and Visit Costa Rica is a great resource to get some ideas. We also loved shopping for souvenirs and trinkets that were hand-made by the locals (we are all about supporting local commerce!). We would definitely recommend hitting up the flea market in San Jose if you want the best bargains on typical Costa Rican hand-made gifts. So many good finds there!